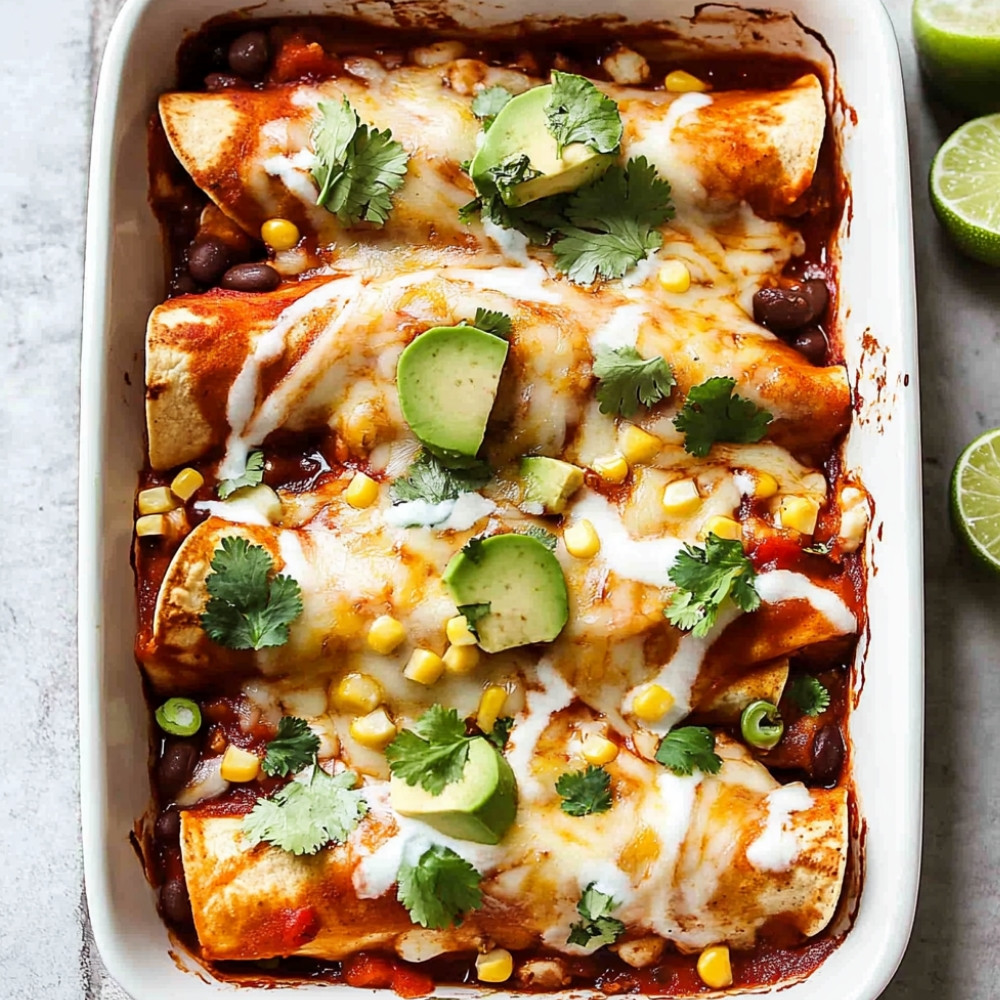
Chicken Enchiladas Recipe
Some days, you just need something a little warm… a little saucy… a little cheesy. That kind of meal that sort of wraps around you the way a big old sweater does, only it smells like smoky chilies and roasted garlic and the tiniest tang of sour cream. These chicken enchiladas? They do that. They’re soft around the edges, a little crisp on the bottom where the tortillas meet the heat of the pan, and then… all that rich, melty cheese. It’s comfort food, yes, but there’s brightness too. With sweet corn, black beans, and that whisper of fresh cilantro at the end – it’s like a dinner hug (that doesn’t take much fuss, happily).
Why You’ll Crave It
- It’s the kind of meal that tastes like you spent all day cooking it… when it’s really just under an hour.
- The sauce soaks into the tortillas just enough – not soggy, just deeply flavorful and kind of luxurious.
- The warm spice of the sauce balances beautifully with the mellow richness of the cheese and the chicken.
- Perfect for using up leftovers, or a rotisserie chicken (which, honestly, I often do).
- It’s family-friendly, but also impressive enough for casual company.
The first time I made this, my sister licked her plate. Quietly. I pretended not to notice, but I definitely noticed.
What You’ll Need
- 3 cups shredded cooked chicken: leftover roast or rotisserie chicken works beautifully – shredded by hand or with two forks
- 1 can black beans (15 oz), drained and rinsed – they add a nice creaminess and earthiness to the filling
- 1 cup corn: fresh, frozen (thawed), or canned – sweet bursts in every bite
- 1 cup salsa: choose your favorite kind – smoky chipotle or classic tomato both give the sauce depth
- 8 flour tortillas (8-inch): soft and pliable, perfect for rolling
- 2 cups shredded cheese: cheddar or a Mexican blend – something sharp and melty
- 1 cup sour cream: for that cool, tangy finish on the side (or dolloped right on top)
- 2 green onions: sliced thin, they bring a bit of mild bite and color at the end
- Fresh cilantro: for garnish – bright, fresh, comforting in that way only cilantro can be
Easy How-To
Make the Filling
In a big mixing bowl, stir up the cooked shredded chicken with black beans, corn, 1 cup of your chosen salsa, about half the cheese, and a handful of chopped cilantro. It should feel hearty and well mixed – not too wet.
Prep the Tortillas
If your tortillas are a little stiff, warm them just a bit. I do mine stacked in a damp paper towel in the microwave for 30 seconds or so – makes rolling them much easier and less likely to crack.
Roll It Up
Spoon the filling down the center of each tortilla – not too much, about 1/3 to 1/2 cup. Fold the sides over and roll them tightly. Nestle them into a greased baking dish, seam-side down, tucked in snug against each other.
Sauce and Cheese Layer
Pour the rest of the salsa evenly over the rolled enchiladas, then scatter the remaining cheese on top. A little extra never hurts here – cheesy and golden feels celebratory.
Bake Until Bubbly
Cover with foil and bake at 350°F (175°C) for 20 minutes. Remove the foil and bake another 10 minutes, or until the cheese is melty and golden in spots. Let them sit for a few minutes after baking – they settle and kind of soak in their own gorgeousness.
Garnish and Serve
Spoon sour cream over the top, scatter sliced green onions and more chopped cilantro, maybe avocado if you’ve got one lounging on the counter. Then serve… proudly (with a fork… and maybe a napkin tucked under your chin).
Good to Know
- I’ve burned my tongue more times than I’d like to admit – let them cool a little before diving in.
- You can definitely sneak in spinach, diced bell pepper, or even leftover rice. It all blends beautifully.
- If you don’t love cilantro (I get it), chopped parsley or thin-sliced radishes on top can bring some brightness instead.
Serving Ideas
- Serve with a simple side salad dressed in lime juice and olive oil – something crisp next to all the richness.
- Mexican rice or even plain white rice makes a great pairing – something to catch the sauce on the plate.
- Cold cerveza or lime water feels like a good idea… short of a margarita, if it’s that kind of night.
Top Tricks
- Warm the tortillas before rolling – they’ll thank you by not tearing.
- If your salsa isn’t quite saucy enough, add a splash of broth or water to make it pourable.
- Prep ahead: assemble everything the night before and bake when you’re ready. The flavors only deepen.
Frequently Asked Questions
Can I use rotisserie chicken for the enchiladas?
Absolutely. It’s actually what I do most often. Just shred it while it’s warm – it’s easier and somehow more satisfying.
Are these chicken enchiladas spicy?
That depends mostly on your salsa. Choose a mild one if you’re cooking for sensitive palates – add hot sauce at the table for others.
Can I freeze chicken enchiladas?
Yes – they freeze beautifully. Assemble them in a foil tray, wrap tightly, and freeze. When ready, thaw overnight and bake as usual.
What kind of cheese is best?
Sharp cheddar or a blend of cheddar, Monterey Jack, and maybe a pinch of mozzarella. Melty and flavorful does the trick.
How can I make this vegetarian?
Skip the chicken and double the beans and corn, or add sautéed mushrooms and peppers for a savory depth. Still hearty, still soul-satisfying.