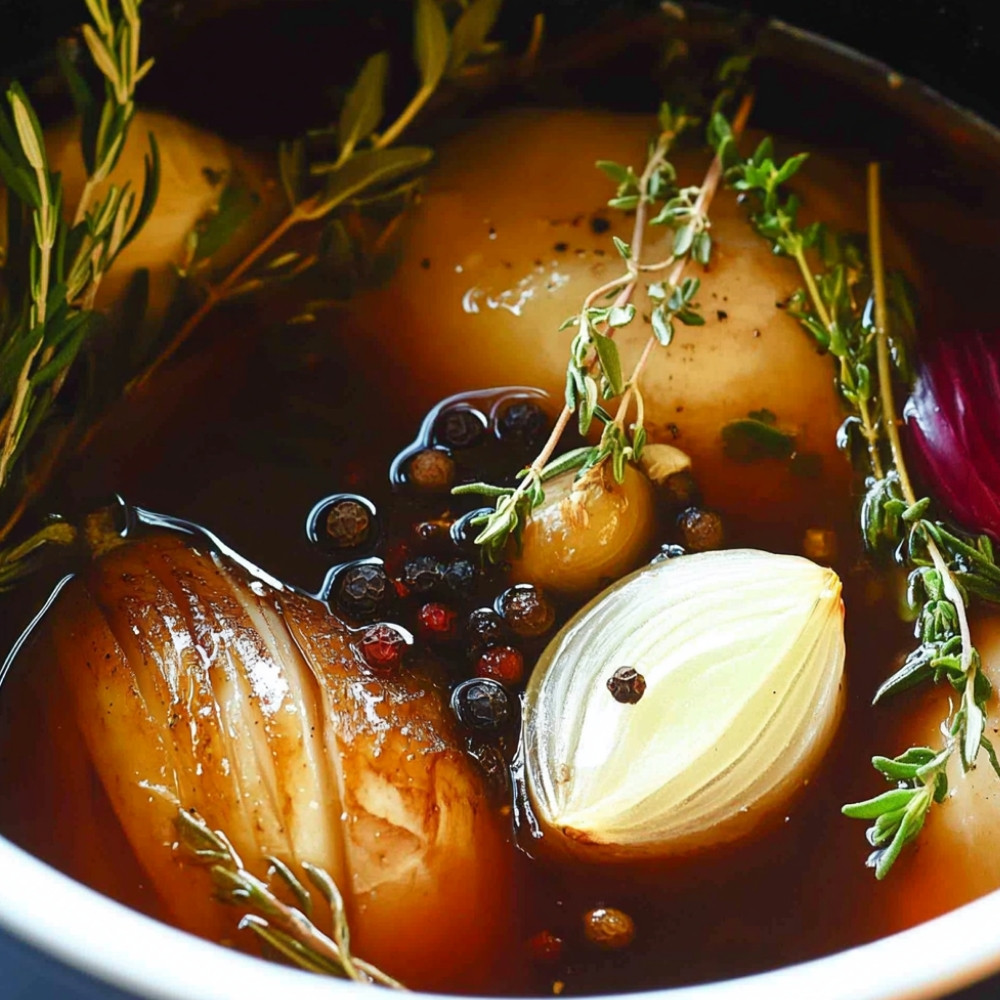
Turkey Brine Solution
Oh, hey there! If you’ve ever thought about how to take your turkey from just okay to oh-my-gosh, you have to try brining! Seriously, this turkey brine solution is like a flavor hug for your bird. Just imagine a beautifully roasted turkey, golden brown and dripping with deliciousness. The best part? It’s super simple to whip up, and trust me—once you brine, you’ll never go back!
Why You’ll Crave It
- This brine makes sure your turkey is juicy, like impressively juicy… perfect for those holiday feasts.
- You can get creative—add your favorite herbs or spices to really make it yours!
- It’s one of those kitchen tricks that’ll have your family asking you for the secret recipe… and you can smile and say, “It’s just brine!”
- It infuses your turkey with flavor. I mean, who doesn’t want to bite into a turkey that sings with spices?
The first time I made this brine, my family couldn’t stop raving about it, and it’s now a must-have at every gathering.
What You’ll Need
- Water: 1 gallon, just plain water, nothing fancy…
- Salt: 1 cup of kosher salt, it dissolves really well.
- Brown sugar: 1/2 cup, for that sweet touch…
- Black peppercorns: 1 tablespoon, for a little kick.
- Allspice berries: 1 tablespoon, trust me on this one.
- Crushed garlic: 4 cloves, because garlic makes everything better, am I right?
- Fresh rosemary: 1 tablespoon (or 1 teaspoon dried), for a hint of earthiness.
- Fresh thyme: 1 tablespoon (or 1 teaspoon dried), adding that lovely aromatic quality.
- Ice: 1 gallon, it’ll cool down the brine quickly.
Easy How-To
Mixing it Up
Alright, first things first! Grab a big pot and throw in the water, salt, brown sugar, and spices. Stir it all together and bring it to a boil. Yeah, I know—boiling seems like it might complicate things, but it’s just to help everything dissolve. You don’t want any gritty bits of salt in your turkey!
Cooling Down
Once it’s bubbling away nicely, take it off the heat. Seriously, let it chill. You don’t want to dump hot brine on your turkey. Let it cool to room temp, and then toss in the ice to get it nice and cold.
Turkey Time
While that’s cooling, take a moment to prep your turkey. It needs a good rinse… and don’t forget to remove the neck and giblets—those guys can be a surprise if you forget! Give your turkey a nice cold water rinse—just keeping it clean.
Get Brining
Once your brine is super chilly, find a container or a big brining bag, whatever works. Put the turkey in there, pour that brine all over, making sure it’s well submerged. Sometimes you gotta work a little to get it all under—if you need, use a plate to weigh it down. Just make sure it’s all covered!
Fridge & Wait
Now, cover it up and pop it in the fridge! Let it soak in all that goodness for at least 12 hours. Honestly, 24 is better for flavor, but hey, I get it if you’re short on time.
Final Touches
When you’re ready, take out that turkey, rinse it thoroughly under cold water to get rid of excess salt. Pat it dry. And then it’s up to you how you wanna cook that beauty—just keep in mind it might cook faster, so check on it!
Good to Know
- If using a different salt, like table salt, go easy! You might not need a whole cup since it’s finer.
- Try switching up the herbs or even add citrus for a twist—you can never go wrong with creativity!
Serving Ideas
- This turkey deserves a beautiful presentation—serve it with a seasonal veggie side and your favorite gravy. Maybe some cranberry sauce… oh, definitely!
Top Tricks
- Don’t skip rinsing the turkey post-brining. That extra salt can overwhelm the flavors if you forget.
Frequently Asked Questions
What’s the main point of brining?
Brining enhances moisture retention and flavor, resulting in a turkey that’s juicy and much tastier than a non-brined one!
How long do I really need to brine it?
At least 12 hours, but if you can squeeze in 24, you’ll really maximize those flavors.
Is table salt okay for brining?
For sure, but remember—use less! It packs a punch, so adjust accordingly.
Do I wash the turkey after brining?
Yes! Rinse it under cold water to get rid of that saltiness on the surface. It keeps everything balanced.
Can I experiment with my brine?
Absolutely! Toss in different herbs, spices, or even some lemon or orange slices for a zesty twist.
Is a plastic bag safe for brining?
Yep! Just make sure it’s food-grade, and you’re good to go!
—
Feel free to take this turkey brine recipe and make it your own. It’s like a canvas waiting for your culinary touch. Happy cooking!