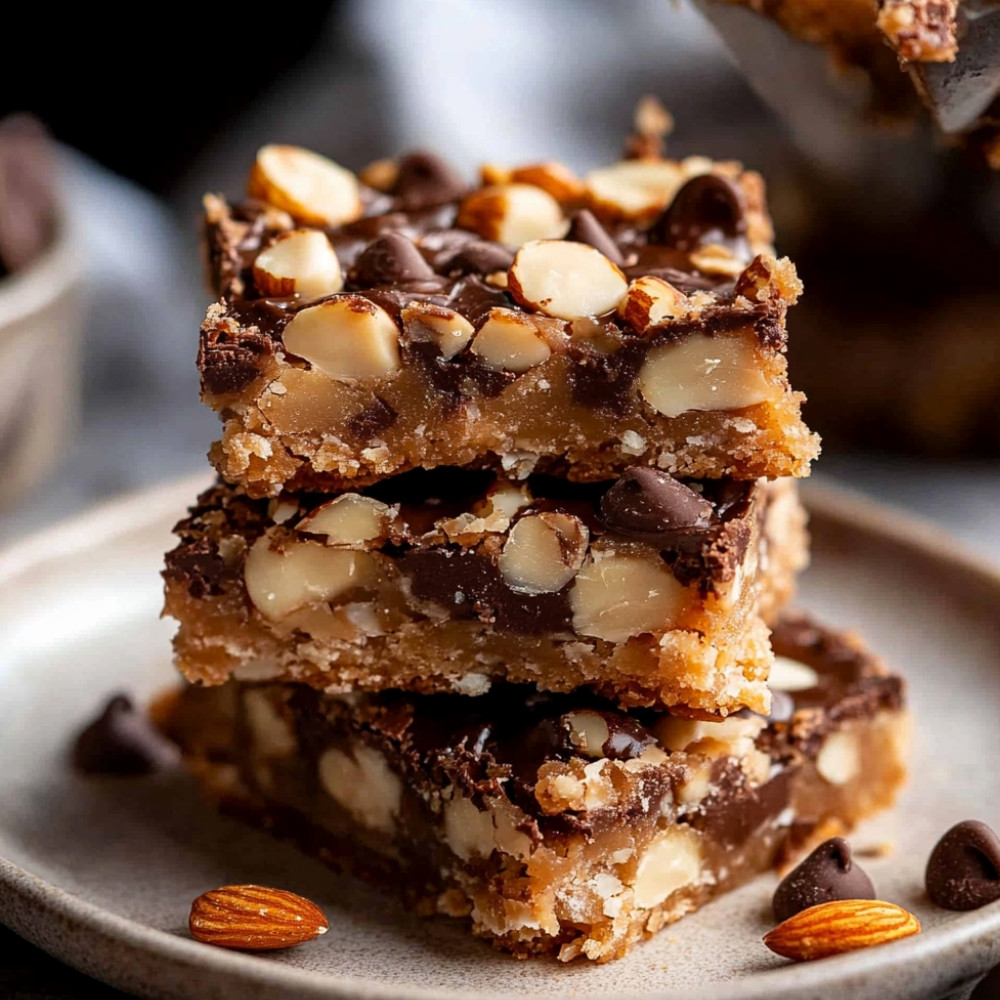
No-Bowl Chocolate Nut Bars: Quick and Easy Delight
Oh my goodness, these No-Bowl Chocolate Nut Bars are seriously the answer to my chocolate cravings! I mean, they’re quick to whip up, super satisfying, and, best of all, there’s no messy bowl to clean afterward. Just imagine rich, melty chocolate mingling with crunchy nuts and a hint of sweetness—it’s just heavenly. They’re the perfect snack to keep in the fridge for those late-night cravings or when you want something sweet but don’t feel like going all out in the kitchen. Trust me, once you try these, you’ll be hooked!
Why You’ll Crave It
- Quick and hassle-free—prep takes like, 10 minutes tops!
- Perfect crunchy texture from the nuts and oats… oh, so good!
- Just a handful of ingredients means you probably have them all at home.
- Versatile—switch up the nuts or chocolate to make your own version.
- Great for satisfying that sweet tooth without any guilt!
Honestly, my family fights over the last one… it’s a bit of a problem, really!
What You’ll Need
- Chocolate: 200g of dark or semi-sweet chocolate, whichever makes your heart sing!
- Mixed nuts: 150g chopped up—feel free to use your favorites like almonds, hazelnuts, or walnuts.
- Oats: 100g of rolled oats, they really give these bars a nice chewiness.
- Honey or maple syrup: 75g, to sweeten just enough and help everything stick together.
- Salt: a pinch—don’t skip this, it really enhances the flavors.
- Vanilla extract: 1 teaspoon, totally optional but adds a nice warmth if you have it on hand.
Easy How-To
Get Started
First things first, preheat your oven to 175 degrees Celsius… or 350 degrees Fahrenheit, if that’s your thing. Line a baking tray with parchment paper—leave a little overhang so you can easily lift the bars out later. You’re gonna thank me for this later!
Mix It Up
Now, in a mixing bowl—yep, just one!—combine those rolled oats, your choice of chopped nuts, and whatever seeds you’re using. Just give it a good mix, like really mix it, so everything is nicely distributed. And don’t worry about overthinking this part!
Melt It Down
Next, in a saucepan over low heat, toss in your nut butter with the honey or maple syrup. Stir it around until everything is nice and smooth… and kind of heavenly smelling, right? It doesn’t take long!
Combine & Fold
Pour that warm, gooey mixture into your dry ingredients. Now the fun part—stir it all up until everything is well coated. You want every bit to get that sticky, sweet love. It takes a minute, but it’s worth it! Then, gently fold in your chocolate chips… you know, just until they’re evenly spread throughout. No need to overdo it!
Bake It
Transfer your mixture into the prepared baking tray and press it down firmly. Use the back of a spatula or even your hands—just make it nice and snug! Pop it in the oven for about 20 to 25 minutes, until the edges are turning a beautiful golden brown. It smells so good, just wait!
Cool & Cut
Once it’s baked, let it cool in the pan for at least 10 minutes. This is important! Use that parchment overhang to lift it out and then place it on a wire rack to cool completely. When it’s cool, feel free to cut it into bars or squares—or whatever shape you like!
Good to Know
- You can totally customize this recipe. Like, throw in some dried fruit or coconut flakes if that’s your jam.
- Looking to be nut-free? Sunflower seed butter works as a fab alternative, and it’s delicious!
- If you want to boost the nutritional punch, adding chia seeds or flax seeds is a great idea!
Serving Ideas
- These bars are perfect with a warm cup of tea or coffee… really, they complement each other nicely.
Top Tricks
- Make sure to press down hard when you shape the bars; it helps them hold together better.
Frequently Asked Questions
Can I substitute nuts in this recipe?
Oh, definitely! Use whatever nuts you love, or even seeds if you’re feeling adventurous. Just make it yours!
How long do these chocolate nut bars last?
They can last about a week at room temp, but if you want them to stick around longer, just pop them in the fridge!
Can I use different types of chocolate?
Absolutely! Milk, dark, or even white chocolate—whatever tickles your fancy. Just go with what you like!
Are these bars gluten-free?
Yes, if you use certified gluten-free oats and other ingredients, you’re all set!
Can I add dried fruits or seeds?
For sure! Adding dried fruits or seeds can totally amp up the flavor and nutrition. Get creative!
Conclusion
These No-Bowl Chocolate Nut Bars are not just a treat, they’re a little slice of happiness that come together so easily. You get to indulge without feeling guilty, and you can whip them up on a whim. Seriously, next time you’re craving something sweet, reach for this recipe—you won’t regret it.
More recipes suggestions and combination
Nut and Seed Granola Bars
Mix oats, nuts, and seeds with honey and peanut butter for a chewy breakfast treat.
Chocolate-Coconut Energy Balls
Blend dates, coconut, and cacao for guilt-free snacking on the go.
Fruit and Nut Energy Bars
Combine dried fruits with nuts for a wholesome energy boost.
Peanut Butter Chocolate Chip Cookies
Whip up quick cookies with peanut butter and oats for the ultimate comfort treat.
Yogurt Parfait with Granola
Layer yogurt with granola and fresh fruits for a refreshing dish.
Cocoa Almond Butter Spread
Blend cocoa with almond butter and honey for a delicious spread on your favorite toast.