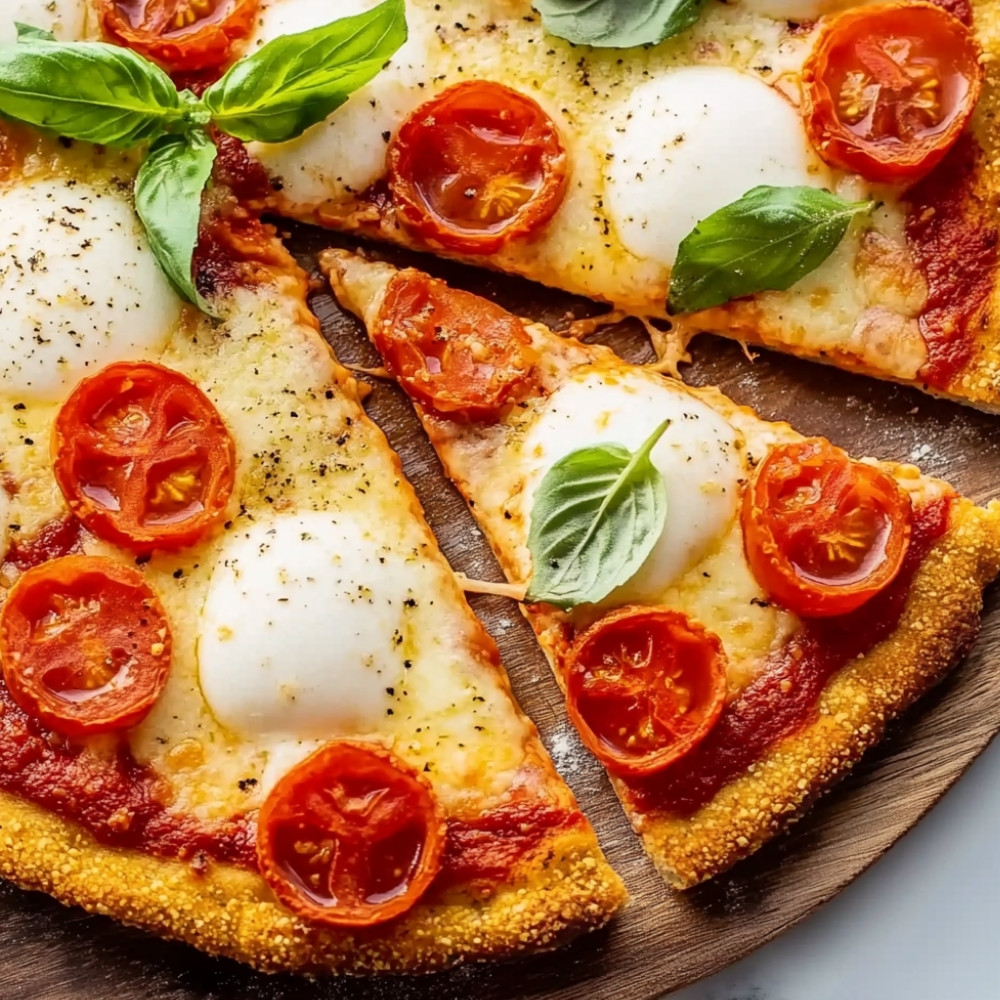
Cauliflower Pizza Crust
It’s funny how cauliflower – such a humble thing, right? slightly awkward and pale – can turn into something this inviting, this golden and crisp-edged and somehow comforting like a warm hand on your back. The first time I made cauliflower pizza crust, my kitchen smelled like roasted cheese and herbs blended up with late Sunday light, and I thought… this could work. It doesn’t taste just like regular crust, of course, but it’s so satisfying in its own way – a little nutty, a little chewy, the kind of thing you want to tear and eat with your fingers straight from the pan while standing at the counter. And it just makes you feel… oddly good.
Why You’ll Crave It
- No flour, just flavor – you get that cozy pizza feeling without the post-carb slump
- The edges crisp up beautifully (especially if you don’t skip the squeezing part)
- It holds together – won’t fall apart the way some veggie-based crusts do
- Customizable – go classic with mozzarella and basil or leftover-roasted-veggies and goat cheese
- It tricks your brain (in the best way) into thinking you’re indulging, even when you’re not
The first time I made it for my parents, my dad didn’t believe it had cauliflower in it at all… said it tasted “too good to be a vegetable crust.”
What You’ll Need
- 1 medium head cauliflower: chopped into florets and pulsed until it looks like fluffy rice
- 1 ½ cups mozzarella cheese: shredded, not pre-bagged if you can help it (melts so much better)
- ¼ cup Parmesan cheese: finely grated, gives a slightly salty kick
- 1 large egg: cracked and lightly beaten
- 1 tsp Italian seasoning: dried is fine, or a mix of oregano, thyme, maybe a little rosemary
- ½ tsp garlic powder: not too much, just a whisper of warmth
- ½ tsp salt: I usually go for sea salt – adds just the right brightness
- ¼ tsp black pepper: freshly ground, if you like a little pop
Easy How-To
Get That Oven Hot
Start with preheating your oven to 400°F (204°C). That gives the crust a solid start – you want it hot and ready before anything hits the sheet pan.
Rice the Cauliflower
After cutting off stems and leaves, chop your cauliflower into chunks and pulse in a processor until the texture’s a bit like couscous. Not too fine or it turns mushy.
Give it a Quick Cook
Pop the cauliflower “rice” into a microwave-safe bowl, cover it, and microwave for 5 to 7 minutes. It should be steamy and tender – let it sit a minute or two before the next step.
Squeeze Like You Mean It
Once it’s cool enough to handle, dump the cauliflower into a clean, thin kitchen towel or some cheesecloth, and wring out every drop you can. This takes effort. But crispy crust depends on it.
Mix the Magic Together
In a medium bowl, combine the cooled, dry cauliflower with shredded mozzarella, Parmesan, the egg, seasonings, salt, pepper – all of it. Stir until it binds and looks like a slightly sticky dough.
Shape & Bake the Crust
On a parchment-lined baking sheet, press the dough into a 12-inch circle, about ¼-inch thick. Keep the edges just a touch thicker – like a border to catch melted cheese.
Roast It Right
Slide the crust into the oven for 25–30 minutes, until the edges start to brown and it smells like cheesy toast. Don’t rush this part – wait until it’s golden through the center.
Top It & Finish Baking
Add toppings! Whatever sings to you. Then back in the oven for 10 to 15 minutes, depending on what you’ve added and how bubbly you like your cheese.
Slice & Serve (Napkins Optional)
Let it cool slightly before slicing – it holds better that way. You can grab it with your hands or use a fork, but I promise you’ll want another piece.
Good to Know
- If you’re in a rush (or just tired), you can microwave the cauliflower the night before, then wring and store it chilled until tomorrow’s use
- Don’t use wax paper instead of parchment – learned this the hard way… melted into the crust (a mess)
- If the crust seems too soft, just bake it 5–7 minutes longer before adding toppings – it’s quite forgiving
Serving Ideas
- Top it with sautéed mushrooms, caramelized onions, and goat cheese for a rich vegetarian combo
- Try pesto, cherry tomatoes, and shredded roasted chicken for a slightly sweet, herby version
- Serve it sliced into squares alongside a crisp, peppery arugula salad with lemon vinaigrette
Top Tricks
- Always let the crust rest for 2–3 minutes after its first bake – helps it firm up before loading with toppings
- If you’re using extra juicy veggies (like fresh tomatoes), blot or roast them first so the crust doesn’t get soggy
Frequently Asked Questions
Can I skip the squeezing part?
Not really. It’s the most important step for a sturdy crust. If it stays too wet, the crust will steam instead of crisp and fall apart under toppings.
Can I make it without cheese?
You can try dairy-free cheese or nutritional yeast plus ground flaxseed (for binding), though it changes the texture a lot. Worth experimenting!
How do I make it crispier?
Longer bake time, less moisture, and a hot oven. Use parchment (not foil) and keep the crust thin, especially in the middle.
Does it taste like cauliflower?
Honestly… a little. But it’s more like roasted nuttiness than anything clearly “cauliflower-y” – and the cheese and herbs take over in a good way.
Can I freeze the crust?
Yes! Bake the crust fully, let it cool, then wrap and freeze. Reheat in the oven (not microwave) straight from frozen until warm and crispy again.