Potato Kugel
There’s something deeply comforting about potato kugel – the kind that crackles at the edges, golden and a little chaotic, with the inside staying soft and tender, almost creamy. I can still remember the warm smell of grated onion and potato wafting from the oven, filling the kitchen with that unmistakable, homey richness. It’s the kind of dish that doesn’t shout for attention but somehow becomes the thing everyone goes back for, fork hovering before politely asking, “May I take the last piece?” (and they always do…)
Why You’ll Crave It
- It’s deeply satisfying – crispy bearded edges, soft middles, salty and just a tiny bite of pepper
- Perfect for holidays but also weekday dinners you want to feel more special
- It requires just a basket of humble ingredients – mostly pantry staples
- You can serve it hot, warm, or even next-day cold (don’t knock it ‘til you try it)
- That smell while it bakes… like pure nostalgia, even if you didn’t grow up with it
The first time I made this for someone outside my family, they said it tasted “like something you didn’t know you missed” – and I think about that often.
What You’ll Need
- 6 medium russet potatoes: peeled and grated, they hold together beautifully and crisp up nicely
- 1 large yellow onion: grated manually or pulsed in a processor – it’ll add sweetness once it bakes
- 3 large eggs: add structure and give the kugel a custardy lift
- 1/2 cup vegetable oil: classic and neutral, it helps with those magical crispy bits
- 1/2 cup matzo meal: gives texture and helps bind – kind of like breadcrumbs, but lighter
- 1 teaspoon kosher salt: not too much, but enough to make it taste right
- 1/2 teaspoon black pepper: just enough for a gentle hum of heat
- 1/2 teaspoon garlic powder: optional, but I never skip it – it deepens the flavor quietly
Easy How-To
Preheat and prepare
Get your oven warm – 375°F is perfect. While that’s heating, pour a little oil into a 9×13″ dish and swirl it around or brush it so the bottom gets glossy. You can put the dish into the oven now for a few minutes – it helps give the bottom a little sizzle-start (totally optional, but I like it better this way).
Grate and soak the potatoes
This part is always a little messy. I use the food processor now, but sometimes still do it by hand if I want that exact, uneven shred my grandmother’s had. Once grated, drop the potato into a big bowl of cold water – it keeps them from browning and pulls out some of their starch.
Grate your onion too
Grating onions can be a little emotional (I cry every single time), but it’s worth the effort. They’ll blend right in and almost melt during baking.
Squeeze out the water (really well)
After 10 minutes or so, drain the potatoes and wrap them in a clean towel (one you don’t mind staining a little). Twist and squeeze like your life depends on it – dry potatoes mean crispy top and edges later. Don’t rush this part.
Mix everything together
In a big bowl, stir together the potatoes, onion, oil, eggs, matzo meal, salt, pepper, and garlic powder. It should feel thick but moist – not wet or soupy. Taste a bit for seasoning if you’re brave (the rawness can be a bit much, but it helps).
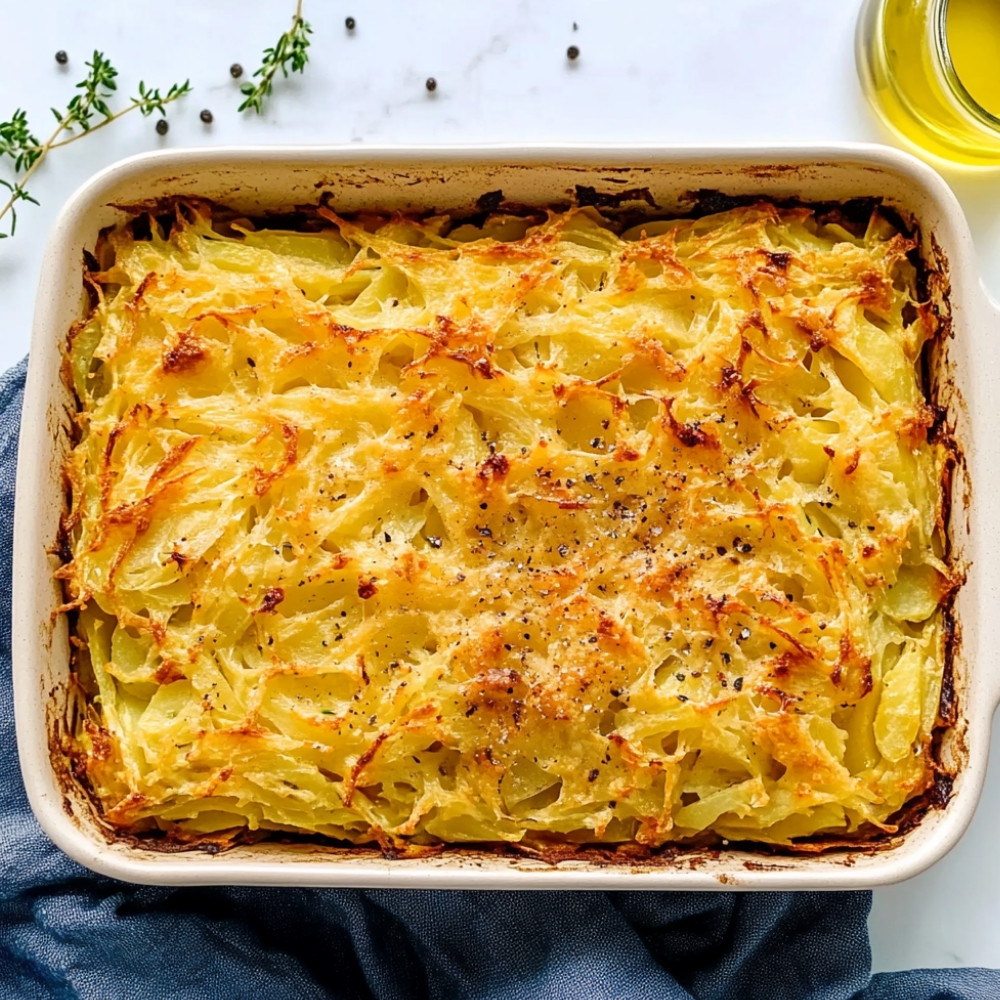
Bake until golden
Pour that mixture into your hot (or just oiled) pan and press it down gently with a spatula – not too hard. Bake for about 45 minutes–1 hour, or honestly, until the top is deeply golden and there’s a lovely brown lace forming around the edges. Let it sit for 10 minutes before diving in.
Good to Know
- If you taste it and the seasoning is quiet, add more salt next time – potatoes are sponges!
- The smell of this baking will haunt every corner of your house in the best possible way
- If the top isn’t browning enough near the end, flip the broiler on low for 2–3 minutes. Watch closely – it changes fast!
Serving Ideas
- Serve hot with applesauce or sour cream (I like a little of both – something about that balance)
- Slice cold leftovers the next day and pan-fry them in a little butter for a crispy breakfast side
- Use it as a hearty base under poached eggs or roasted mushrooms – unexpectedly lovely
Top Tricks
- Letting the kugel sit 10 minutes before slicing isn’t just polite – it helps set the texture, so the pieces come out cleanly
- If you can, use a metal baking pan, not glass. The edges crisp better and faster
- Double the recipe and freeze one tray – it reheats beautifully in a 300°F oven, covered in foil
Frequently Asked Questions
Can I make potato kugel ahead of time?
Yes – you can grate and mix everything the day before, then refrigerate the whole bowl (covered) and bake it the next day. Give it a quick stir before baking, as some liquid may separate.
Does it freeze well?
Absolutely. Let it cool fully, then slice and freeze in portions. Reheat uncovered or loosely foiled at 325°F until warm and crisped up again.
What’s the best kind of potato to use?
Russets, without a doubt. They’re starchy enough to hold together and crisp up on the outside while staying soft in the middle. Yukon Golds work too, but the texture is a bit more tender and less crispy.
Can I make it without eggs?
Yes, but it takes a little tweaking. Use flax eggs (1 tbsp flaxseed meal + 2.5 tbsp water per egg), and be sure to drain the potatoes super well so it holds together.
Is this really different from latkes?
It is. Same roots, different branches. Kugel is baked, not fried, and has a smoother, more casserole-like feel – but still gets that wonderful crunch on top and sides.