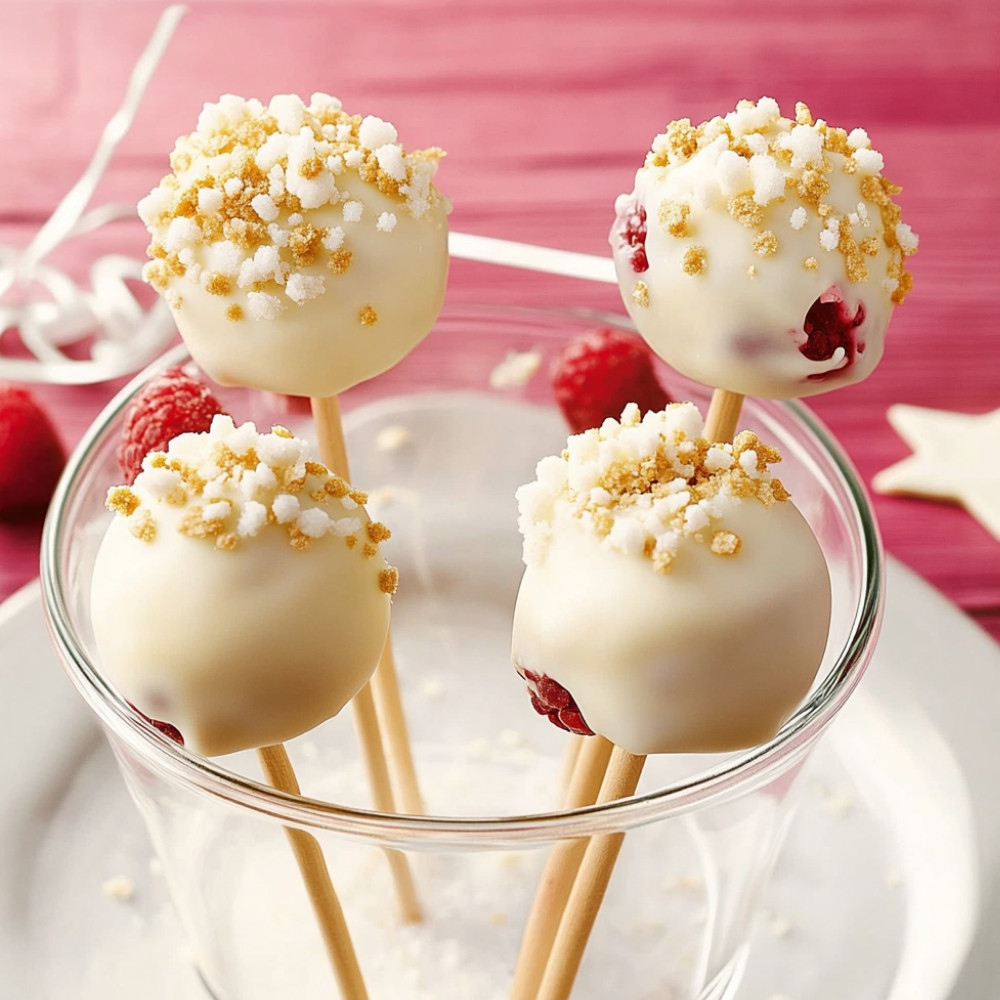
Cheese and Raspberry Cake Pops
The first time I made these cheese and raspberry cake pops, I remember the kitchen smelled like warmth and berries… kind of tangy-sweet, like sun-warmed fruit on toast, if that makes any sense. The cream cheese softened in the bowl while I mashed raspberries that stained everything red – my fingers, the counter, even a dish towel I shouldn’t have used. But it felt good. A little messy, a little joyful. These aren’t fussy, not really – they just ask for a bit of your time and a willingness to roll your hands into something delicious.
Why You’ll Crave It
- The almost cheesecakey richness pairs perfectly with the bright zing of raspberries (a flavor combo that always feels a little indulgent)
- No oven required – just mix, roll, chill, and dip. Done and done.
- They’re so pretty… each one like a tiny gift you dipped in chocolate
- You can make them ahead – actually, you kind of need to – which is such a relief when you’re hosting
The first time I brought these to a potluck, they disappeared before I even found a plate. I just stood there, holding the tin, laughing.
What You’ll Need
- 200g cream cheese: full-fat, at room temp is best – soft and ready to mix
- 100g raspberry purée: you can strain out seeds if you like it smooth, or leave them for texture
- 100g icing sugar: sifted is better but honestly, I don’t always bother
- 150g crushed biscuits: graham crackers, digestives, or anything plain and buttery
- 200g chocolate for coating: white works beautifully with the berries, but milk or dark if that’s your thing
- Sprinkles or crushed nuts: for decoration – optional but… why not?
Easy How-To
Make the creamy base
In a large bowl, stir the cream cheese and icing sugar until really smooth – use a spatula or even the back of a spoon. It should feel like thick frosting.
Add the raspberries
Fold in the raspberry purée gently. It’ll turn a pale pink and smell gorgeous. Try not to overmix or it becomes a little runny… a few swirls are perfectly fine.
Bring it together
Add the crushed biscuits and stir until it starts to hold together. It’ll feel like a soft dough – sticky but not wet. If it’s too soft, add a tablespoon more of biscuit crumbs.
Roll the balls
Take small pieces (about a tablespoon) and gently roll into smooth balls. Place them on a tray lined with parchment paper. Try to make them similar in size, but if they’re not identical, it’s completely okay.
Chill!
Pop the tray in the fridge for 30 minutes. This step helps everything firm up so they won’t fall apart in the chocolate later on.
Melt the chocolate
Use a microwave in short bursts or a makeshift double boiler. Stir gently until it’s glossy and smooth. Don’t rush – chocolate burns fast.
Dip and decorate
Stick a lollipop stick or small skewer into each cake pop, then dip into the melted chocolate. Let the extra drip off (I twirl them a bit), and sprinkle with whatever you like before the coating sets.
Set and serve
Place them back on the tray, and either let them sit at room temp until the coating firms, or speed things up in the fridge. They’re ready once the chocolate has hardened with a quiet snap.
Good to Know
- If the mixture is too soft to roll, give it a few minutes in the fridge – it’s just the cheese being fussy
- Use gloves if you’re making a big batch – the mixture sticks to warm hands pretty fast
- Don’t worry if the coating isn’t perfect – swirls and drips have their own charm
Serving Ideas
- Arrange in a jar or vase, bouquet-style – looks festive on a dessert table
- Wrap each one in wax paper and tie with twine for sweet little party favors
Top Tricks
- Chill the dipped cake pops stick-side up in a block of styrofoam (or a colander turned upside down) to keep them nice and round
Frequently Asked Questions
Can I use different fruits instead of raspberries?
Yes, definitely. Strawberries, blackberries, even chopped cherries work. Just be mindful of extra moisture – you might need a little more biscuit if things get too wet.
How long do they last?
They keep well in the fridge for up to 5 days. After that the texture starts to soften and the coating might get a bit sticky.
Can I freeze them?
You can, actually. Freeze them after dipping (once fully set), and store in an airtight container. Let them thaw in the fridge – they’ll still taste lovely, just not quite as crisp on the outside.
Do I really have to chill them before dipping?
Yes. It’s not optional if you want them to survive the chocolate bath. It firms up the base and keeps them from sliding off the stick.
Is it okay to skip the sticks?
Of course. Just serve them as truffles or little bites. You don’t need a stick to enjoy them – sometimes I don’t even bother when I’m making them just for me.