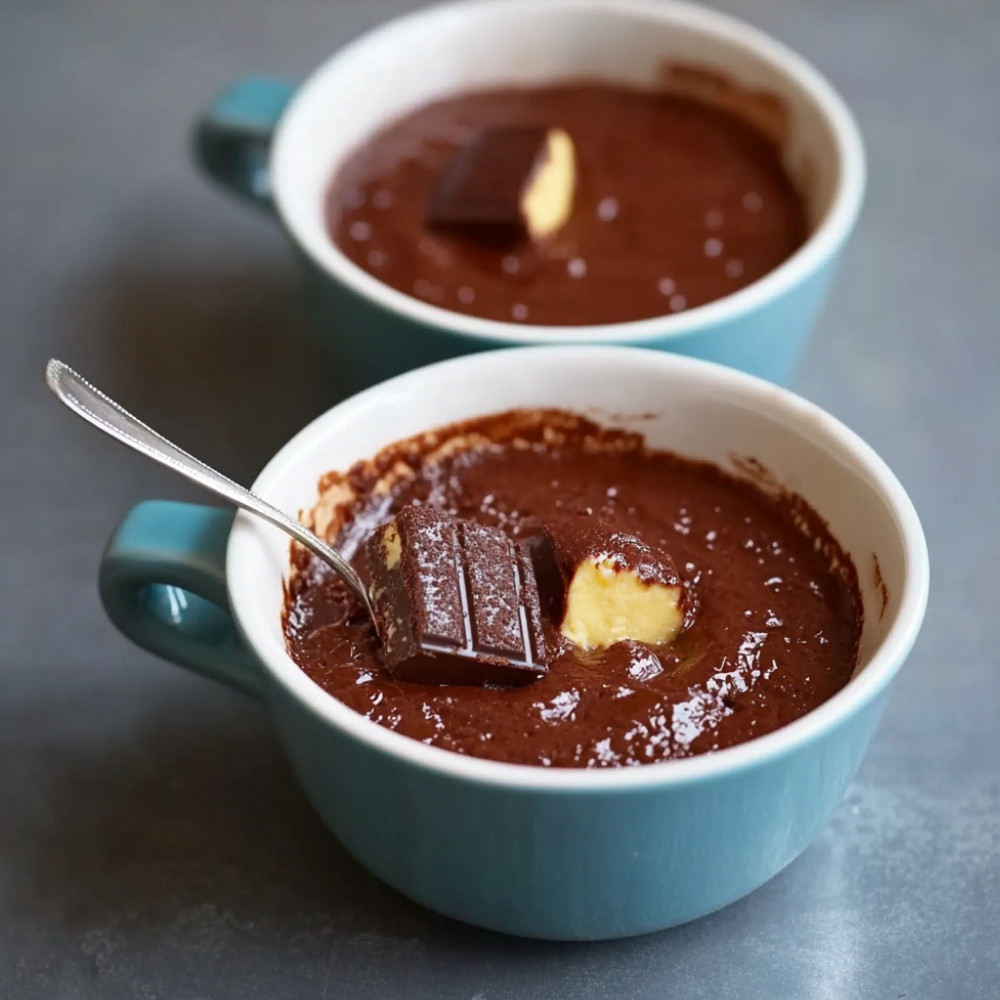
Decadent Chocolate Puddings in Minutes Using a Microwave
Okay, so picture this: it’s a cozy evening, and all you really want is a warm, rich chocolate pudding to just dive into… You can almost taste it, can’t you? Now, what if I told you that you can whip it up in just minutes, using your microwave? Yes, really! This microwave chocolate pudding recipe is all about satisfying that sweet craving without breaking a sweat. Simple ingredients, quick prep, and I promise, that gooey chocolate goodness will have you dreaming about it long after the last bite…
Why You’ll Crave It
- You won’t believe how quickly you can go from craving to indulging—like, seriously!
- Every spoonful is warm, gooey heaven, just the right amount of chocolatey richness.
- No fancy equipment needed, just a microwave and your trusty ramekins.
- Perfect for late-night snack attacks or unexpected guests—you’ll totally impress them!
- Customize it however you want… I mean, toss in some nuts, or add a scoop of ice cream, and boom.
The first time I made this, I could hardly believe how easy it was… and my friends were fighting over the last spoonful!
What You’ll Need
- 50g dark chocolate: break it into pieces—go for something rich, you know?
- 25g unsalted butter: this is our creamy magic for that luscious texture.
- 50g caster sugar: just the right sweetness, melts easily.
- 1 medium egg: it binds everything beautifully together.
- 25g plain flour: a little bit for structure—just sift it in there.
- A pinch of salt: this enhances all those chocolatey flavors.
Easy How-To
Let’s Get Cooking!
Alright, here we go! First, gather your ingredients… it’s like a little cooking treasure hunt. Once you got everything, grease up those ramekins with a bit of butter—this part is important, or you’ll be wrestling with your pudding later. Then, in a microwave-safe bowl, toss in your chocolate and butter. Microwave for about 30 seconds, give it a stir, and then melt it in 10-second bursts until it’s all smooth and liquidy.
In a separate bowl, whisk together your sugar and that egg until everything’s nice and frothy. Now, here’s where the magic happens—mix in that melted chocolate and butter. Stir until it looks all velvety. Gently sift in the flour, and be gentle, we don’t want to over mix… just combine until, like, no dry bits are left.
Okay, now divide that luscious batter between your ramekins. Pop them in the microwave for about 30 to 50 seconds. The key here is to watch closely! You want the edges set, but the center should still be a bit soft, like a warm hug. Once they’re done, let them cool for a minute—patience, I know, but it’s worth it!
Good to Know
- Your microwave’s wattage can change things a bit—might need to adjust on the fly.
- These puddings are best served warm – but if you’re feeling adventurous, a scoop of ice cream takes it to another level!
- If by some miracle you have leftovers, they can go in the fridge for a short time, warming them up before diving in again…
Serving Ideas
- You can top with a dollop of whipped cream or even a drizzle of caramel… it’s pure decadence!
Top Tricks
- If you’re feeling adventurous, add a pinch of espresso powder to enhance the chocolate flavor—trust me, it’s divine!
Frequently Asked Questions
Can I use different types of chocolate?
Absolutely! Milk chocolate, white chocolate, or even a mix… It’s all about what you like best, really.
What size microwave-safe dish should I use?
Just make sure it’s not too small—give that pudding room to rise. A good ramekin works perfectly!
How do I know when the pudding is cooked?
Check around the edges… they should look set but the middle should have a little jiggle, you know? Like a slight wobble means it’s just right.
Can I make these puddings ahead of time?
You can mix everything up and then store it in the fridge until you’re ready to cook them—really flexible!
—
So, yeah, this microwave chocolate pudding recipe is not just about quick and easy dessert— it’s about bringing a little joy into those busy days. Seriously, give it a try, and let me know how it turned out for you. And don’t forget to experiment, make it your own! Enjoy!