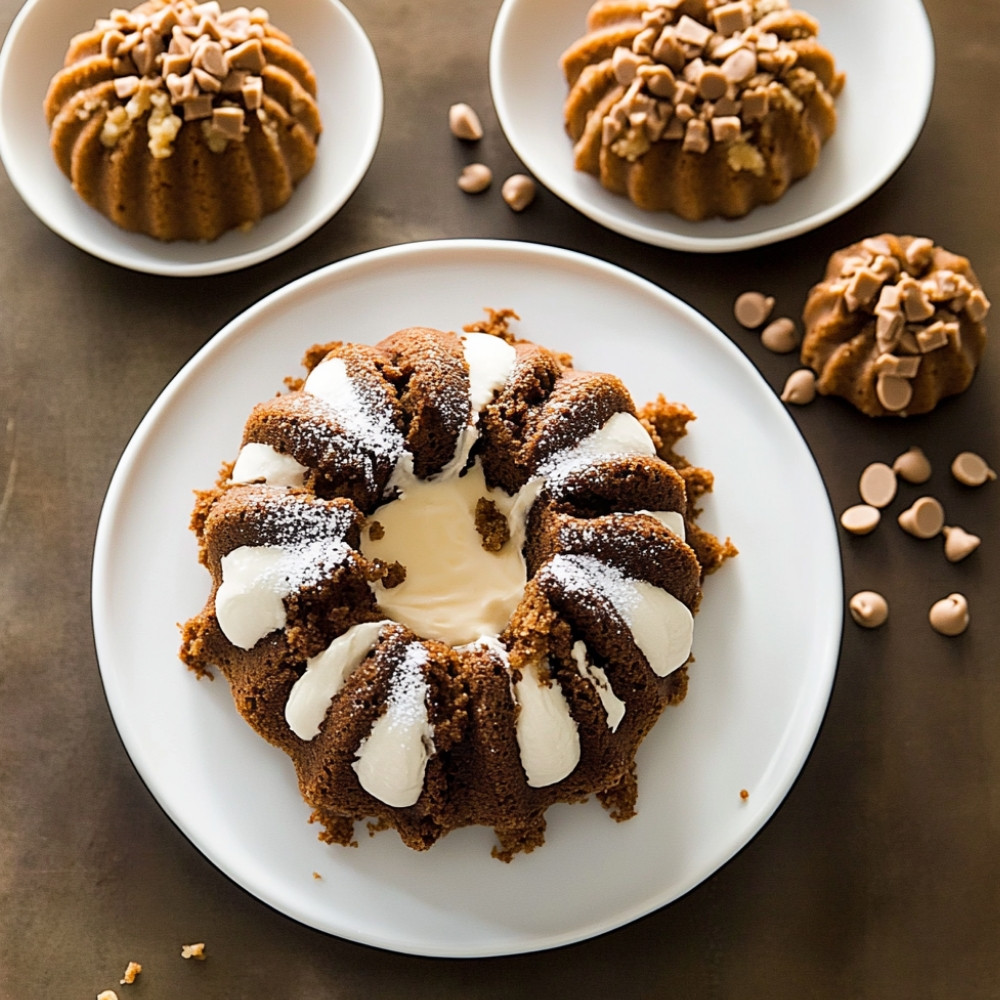
Decadent Mini Peanut Butter Chocolate Bundt Cake Recipe
Alright, let’s talk about something that will make your heart sing—mini peanut butter chocolate bundt cakes. I mean, just imagine these little gems, rich and moist, like a warm hug after a long day. They’re not just a dessert; they’re a celebration of flavors, where creamy peanut butter meets dark, luscious chocolate… and the best part? They’re mini! Perfect for indulging without feeling guilty. Seriously, you’ll want to make these for every get-together, or just because you deserve something special. Trust me, once you take that first bite, you’ll be hooked!
Why You’ll Crave It
- Completely irresistible combo of peanut butter and chocolate—like, who can resist, right?
- These cuties are super easy to whip up, perfect for those last-minute gatherings or movie nights.
- They look fabulous on a dessert table… fancy but without the fuss!
- Portion control? Kind of—since they’re mini, you can have just one… maybe two…
- Your friends will definitely be asking for the recipe—but remember, it’s a secret!
The first time I made these, my family couldn’t stop raving about them… it turned into a little competition for the last piece!
What You’ll Need
- All-purpose flour: 1 cup, to give it that lovely structure; oh so important!
- Granulated sugar: ½ cup, just enough sweetness to balance the cocoa.
- Unsweetened cocoa powder: ¼ cup, a little rich chocolatey goodness.
- Baking powder: 1 teaspoon, to help these guys rise.
- Salt: ½ teaspoon, it just brings everything together beautifully.
- Eggs: 2 large ones, for that dreamy texture…
- Milk: ½ cup, whole or low-fat, just whatever you have on hand!
- Vegetable oil: ⅓ cup, it keeps things moist, you know?
- Peanut butter: ½ cup, the star of the show here!
- Vanilla extract: 1 teaspoon, because it adds that lovely depth of flavor.
- Chocolate chips: ½ cup, for a little extra surprise… yum!
Easy How-To
Let’s Get Baking!
Okay, first things first, preheat your oven to 350°F (175°C). Super important! Now, grab that 6-cup bundt pan and grease it up—really make sure to coat those nooks and crannies… nobody likes a sticky situation! In a bowl, whisk your flour, cocoa powder, baking powder, and salt together. Just until it’s mixed, and then set that aside. Now onto the wet stuff—mix peanut butter with the sugar until it’s all smooth and dreamy, then add the eggs, vanilla, and milk… and beat it until it’s well combined, but don’t overdo it, okay? Now, gently fold in those dry ingredients until just combined… we want it fluffy, not tough!
Pour that batter into your bundt pan, give it a little shake to level it out, and then… into the oven it goes! Bake for about 25 to 30 minutes. You can check for doneness with a toothpick—it should come out clean or with just a few crumbs. Once that’s done, let it cool for about 10-15 minutes before flipping it out onto a wire rack—don’t be too hasty though; let it cool completely before you glaze. Speaking of glaze, melt together some chocolate and butter in the microwave until it’s smooth—yeah, that chocolatey drizzle is going to be the crowning glory!
Good to Know
- If you run out of buttermilk, just mix regular milk with a splash of vinegar and let it sit for a bit—easy substitute!
- You can keep these little beauties in an airtight container, and they’ll stay fresh at room temperature for about three days, or a week in the fridge.
- Feeling adventurous? Try drizzling some caramel on top along with the chocolate glaze… wow, just wow!
Serving Ideas
- Perfect to share at gatherings, maybe with a scoop of vanilla ice cream on the side… oh yeah!
Top Tricks
- Always, always, always check your baking powder for freshness! It can really make or break your cake’s rise.
Frequently Asked Questions
How long should I bake the cake?
Well, baking can vary depending on your oven, so definitely start checking around the 25-minute mark—better safe than sorry!
Can I use a different type of nut butter?
Absolutely! Almond or cashew butter can work, but keep in mind the flavor will shift a bit, but still delicious—in my opinion!
What if I don’t have a bundt pan?
No worries! A standard round cake pan works too. Just adjust the baking time, it might be a little less, so keep an eye on it.
How should I store leftovers?
Just pop them in an airtight container, and you’re good to go! Room temperature works for a few days, but a week in the fridge is better for longer freshness.
—
I hope you find joy in making these mini peanut butter chocolate bundt cakes as much as I do! They really are a little slice of heaven and sure to bring smiles all around. Enjoy the sweetness!