Healthy Chicken Pot Pie
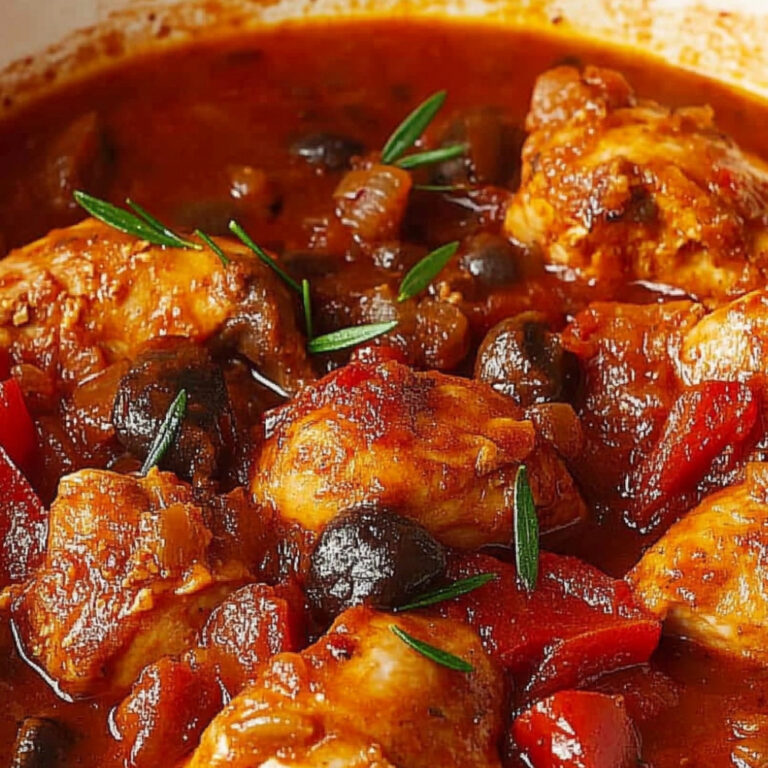
so, picture this: it’s a late afternoon, gently chilly outside, the kind that makes you crave something warm and soft and a little bit nostalgic… and the kitchen smells like thyme and onions melting into olive oil, with little bursts of savory steam wafting up as you stir. That’s the feeling this healthy chicken pot pie brings. It’s comforting, familiar, but it doesn’t sit heavy in your belly the way the old-school ones sometimes do. There’s still the golden crust (yes, really flaky), plenty of creamy filling, and vegetables that feel like they still have some life in them. It’s not just a lighter version – it’s its own lovely thing.
Why You’ll Crave It
- Classic comfort food feel, with lighter ingredients for everyday dinners
- The sauce is creamy – thanks to coconut milk – but surprisingly fresh on the palate
- Loaded with hearty vegetables, tender chicken, and herbs that make it feel homey
- That crust! Just enough richness without tipping it over
- Satisfies the soul without weighing you down post-meal (yes, really)
The first time I made this, I remember standing there midway through simmering the filling and just… grinning at the smell. My apartment smelled like a hug.
What You’ll Need
- Chicken breast: 2 cups cooked and shredded – leftover roast works beautifully too
- Carrots: 1 cup diced small, so they cook up tender but keep a bit of bite
- Celery: 1 cup, also diced – the base flavor it gives is worth it
- Frozen peas: 1 cup, added near the end so they stay sweet and green
- Onion: 1 medium, diced – yellow or white both fine, just not sweet onions
- Garlic: 2 cloves, minced (don’t skip, even if tiny)
- Chicken broth: 2 cups – go lower sodium if you want more control
- Coconut milk: 1 cup (the canned kind) for creaminess with subtle depth
- Olive oil: 2 tablespoons, for the base of the sautéing magic
- Dried thyme: 1 teaspoon – it brings that classic warm herbal note
- Salt: 1 teaspoon, though taste as you go
- Black pepper: ½ teaspoon, or more if you like that tiny bite
- Whole wheat pie crust: 1 prepared crust, chilled – homemade or store-bought, no shame either way
Easy How-To
Start with the Veggie Sauté
Add a swirl of olive oil to your skillet, and over medium heat, toss in the carrots, celery, and onion. Let them cook just until the onions are soft and the carrots start to gently soften (about 5 minutes). It starts smelling really good here – don’t rush it.
Add the Garlic and Herbs
Now stir in the garlic and thyme. Keep everything moving so the garlic doesn’t burn. Just a minute or two – enough for everything to feel more fragrant, like something promising is happening.
Make It Creamy
Sprinkle in a spoonful of flour if you want it thicker (optional, depending on your broth), then slowly pour in the chicken broth while stirring so it doesn’t clump. Then the coconut milk goes in. Simmer, gently, maybe 4-5 minutes – it’ll thicken but still stay silky.
Bring in the Chicken & Peas
Add your cooked shredded chicken and frozen peas to the skillet. Stir gently, taste, add salt and pepper as needed. Once everything’s cozy and warm, turn off the heat. Time to build.
Crust it Up
Lightly flour your surface and roll out the whole wheat pie crust. Make sure it’ll cover your pie dish – many crusts shrink a little when baked so give it some wiggle room.
Assemble the Pie
Spoon the filling into your dish (9-inch works well), then lay the crust gently over top. Trim or fold the edges, press them to the sides – I sometimes use my fingers, sometimes a fork.
Vent and Bake
Make a few small slits with a knife on top – I usually do a little star shape. Pop it into a preheated oven at 425°F. Bake for about 25-30 minutes, checking at the 20-minute mark.
Cool Before Cutting
This part’s hard… but let the pie rest for at least 10 minutes before slicing. The filling sets, the crust firms up, and you won’t burn your mouth. Patience pays here.
Good to Know
- If your crust looks too dark before time’s up, loosely tent with foil
- Don’t worry if some filling bubbles out – it adds charm (and flavor caramelized on the edges)
- Leftovers the next day? Honestly… maybe even better
Serving Ideas
- Serve with bitter greens like arugula or curly endive tossed with vinaigrette – a good fresh contrast
- Alongside a mug of lemony broth or even a simple tomato soup, for double warmth
Top Tricks
- Brush the crust lightly with a beaten egg or even a splash of plant milk for a prettier finish
- If the filling feels too runny, let it simmer a few more minutes – it thickens as it rests too
- Freeze leftover filling by itself, then reheat and wrap in pastry or puff later
Frequently Asked Questions
Can I use a store-bought crust?
Absolutely. A good-quality whole wheat or gluten-free crust saves time and still tastes great, especially if you season your filling well.
What if I only have fresh vegetables?
Works beautifully. Just blanch firmer ones (like peas or green beans) ahead of time so they’re not too crunchy post-bake.
Can I skip the coconut milk?
Sure. A mix of low-fat milk and a spoonful of cornstarch works well too, though it won’t have that subtle sweetness or richness the coconut adds.
Is it still healthy with the crust?
It is. Especially if you use a whole grain version and balance the rest of your meal. The crust is part of the comfort – just enjoy in a mindful portion.
Can I make it ahead of time?
Yes – you can make and assemble it a day in advance, pop it in the fridge, and bake fresh when ready. Just add a few extra minutes to the bake time if it’s chilled.