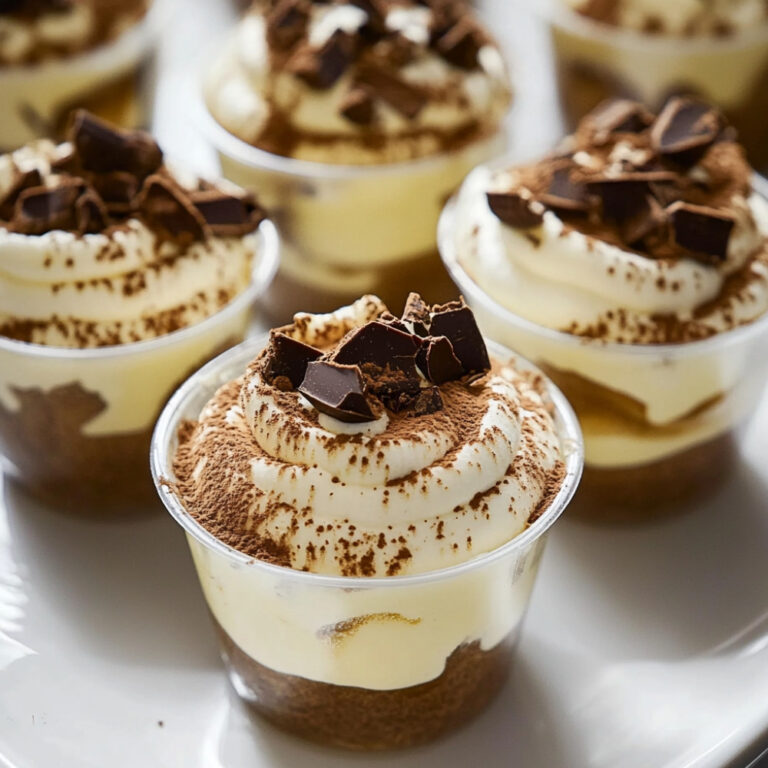
Irresistible Mini Chocolate Cakes That Melt in Your Mouth
Oh boy, let me tell you about these mini chocolate cakes that, honestly, just melt in your mouth. Picture this: a little bite of rich chocolate goodness, so soft and moist—it’s like every cake lover’s dream. They’re perfect for any occasion, really; I mean, who doesn’t love a chocolate treat? Whether it’s a celebration or just a cozy night in, these mini cakes will surely make your heart sing… or at least your taste buds! So, grab your apron and let’s dive into this homey recipe.
Why You’ll Crave It
- Little bites that pack a huge chocolate punch—seriously, you won’t want to stop at one.
- So simple to bake—you can whip these up when unexpected guests drop by.
- Perfect size for sharing, or not… no judgment here if you want them all for yourself.
- Endless ways to decorate them, whether simple sprinkles or lavish frosting—whatever suits your mood!
The first time I made these, my brother kept sneaking into the kitchen for “just one more.”
What You’ll Need
- Flour: 1 cup, all-purpose, it’s the base that holds it all together.
- Cocoa powder: 1/4 cup, make sure it’s good quality for that deep chocolate flavor.
- Baking powder: 1 teaspoon to help them rise beautifully.
- Baking soda: 1/2 teaspoon, just a little for that extra lift.
- Salt: 1/4 teaspoon to balance the sweetness.
- Granulated sugar: 3/4 cup, sweet and enticing.
- Brown sugar: 1/4 cup, for that lovely, rich sweetness.
- Eggs: 2 large, they add that moisture we all love.
- Milk: 1/2 cup, helps keep the batter smooth.
- Vegetable oil: 1/4 cup, gives it that melt-in-your-mouth texture.
- Vanilla extract: 1 teaspoon, because it makes everything better.
- Boiling water: 1/2 cup, trust me, it’s the secret to super moist cakes!
Easy How-To
Let’s Get Started!
First things first, preheat that oven to 350°F (or 180°C, if you’re working in metric). Grab a mini muffin pan—this is where the magic happens—lightly grease it or toss in some cute paper liners. Now, in a bowl, mix together your dry ingredients… flour, cocoa powder, baking powder, baking soda, and salt; just stir it up nice and even. In another bowl, whisk the sugar, eggs, milk, oil, and vanilla; it should be all bubbly and lovely. Then, gently pour the wet into the dry… and mix until just combined. Lumps are fine! Don’t overthink it. When that batter is ready, scoop it into your muffin cups, filling them about two-thirds full. Now comes the best part: bake them for about 10 to 12 minutes. Just keep an eye on them! Let them cool in the pan a bit before moving them to a wire rack. Meanwhile, whip up some frosting using butter, cocoa powder, & powdered sugar—just beat until smooth… you’ll want to lick the whisk. Frost those mini delights when they’re cool. And voila! They’re ready to devour.
Good to Know
- If you don’t have cocoa powder, you can use a carob powder for a different spin!
- Feeling adventurous? Try adding some chocolate chips into the batter before baking for extra gooeyness.
Serving Ideas
- Serve them warm with a scoop of vanilla ice cream—it’s a match made in dessert heaven!
Top Tricks
- To make sure your cakes don’t stick, make sure to grease the muffin pan well, or use those cute liners!
Frequently Asked Questions
Can I use a different type of flour?
Absolutely! But keep in mind… changing the flour might change the texture. All-purpose is just, well, perfect for this recipe.
What can I substitute for eggs?
You can use things like applesauce or mashed bananas, but it does change the taste somewhat, so keep that in mind.
Can I make the batter ahead of time?
Not really, it’s best to use it right after mixing. The rising agents need to work their magic while it’s fresh.
How can I add more flavor to the cakes?
Oh, you can up the ante with a touch of espresso powder or a splash more vanilla; it really complements the chocolate.
Is it possible to make mini cakes in different shapes?
Yes, yes, yes! Use whatever mini pans you have; it’s all about getting creative and having fun!
—
So there you have it! These mini chocolate cakes are honestly a little slice of joy, perfect for sharing… or hoarding, we don’t judge! With just a few simple ingredients and steps, you can create something that’ll bring smiles to the table. Trust me, once you try them, they’ll win a special place in your heart (and your recipe book). Happy baking!