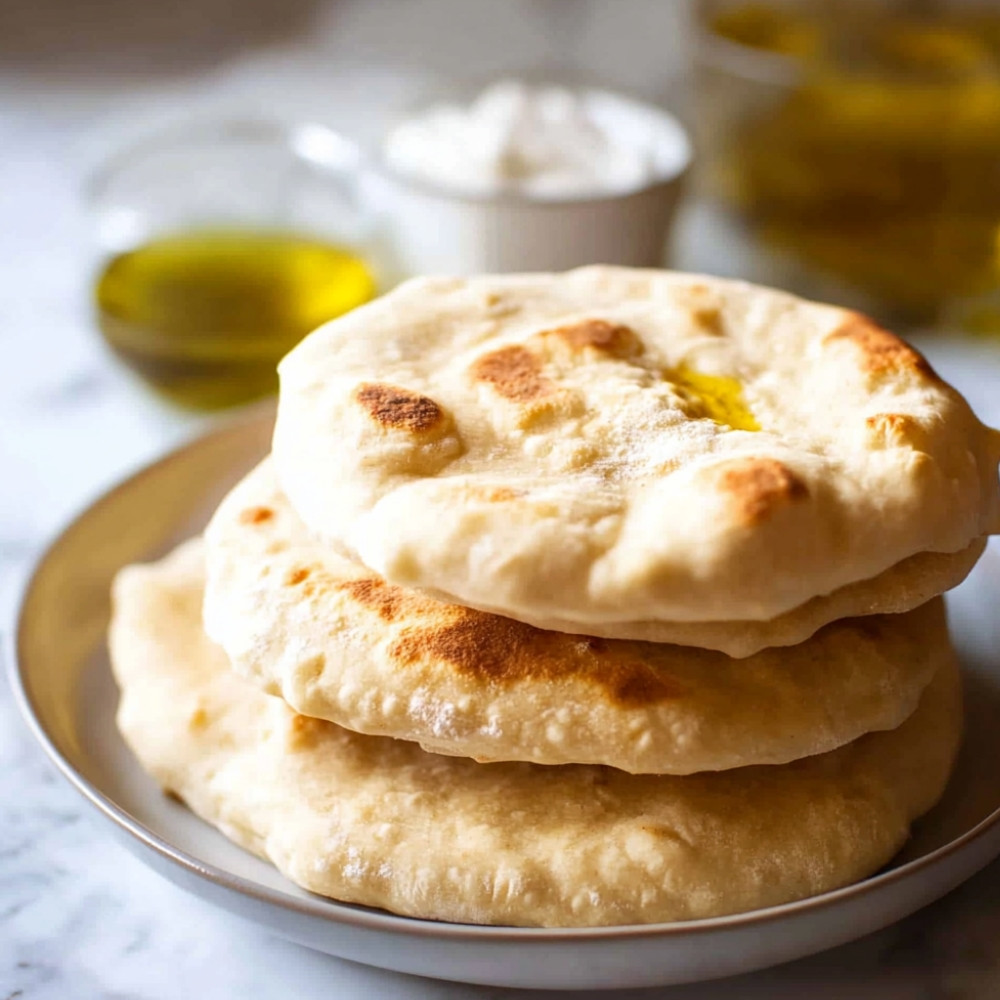
Master Homemade Pita Bread in Just Minutes!
Oh, there’s something simply magical about freshly baked pita bread… Seriously, it’s like having a warm hug in your hands. When you pull it out of the oven and see it puffing up, it’s such a delightful sight! Plus, the smell? It just fills your kitchen with this comforting aroma, like a warm invitation to gather around the table. The best part? Making pita bread is… honestly, so much more fun than you’d think. And once you’ve tried it, you’ll find it hard to go back to store-bought—if you can even imagine doing that!
Why You’ll Crave It
- So, for one, it’s incredibly versatile—use it for dips, sandwiches, or, well, just snacking.
- You can customize it—yeah, add some herbs or spices in the dough for a fun twist!
- The texture is just… wow, fluffy on the inside and soft on the outside. Perfect.
- This whole process can be done in about an hour, so it fits easily into your day.
- You can get the family or friends involved—made it once with my brother and it was a blast!
The first time I made this, I was absolutely amazed at how easy and rewarding it was!
What You’ll Need
- All-purpose flour: 3 cups—this will be the base, make sure it’s fresh!
- Instant yeast: 1 packet (2 ¼ teaspoons)—this helps it rise beautifully!
- Salt: 1 teaspoon—brings out all those lovely flavors…
- Sugar: 1 teaspoon—just a touch, it helps the yeast work its magic!
- Warm water: 1 cup (not hot)—you need it warm, just like a cozy bath!
- Olive oil: 1 tablespoon—adds a hint of richness, you know?
Easy How-To
Mixing the Dough
Okay, so first off, grab a large bowl and mix warm water, yeast, and sugar together. Just let it sit, like… 5 minutes, until it gets all foamy and bubbly—super fun to watch! And then, add your salt and flour gradually. Stir, stir, stir, until a nice dough starts to form. You’ll feel it coming together, trust me!
Good to Know
- If your dough is a bit sticky, don’t panic! Just sprinkle some more flour—easy fix.
- Dough resting is essential! It makes a big difference in texture when you roll it out.
Serving Ideas
- Serve warm right out of the oven with hummus or tzatziki for dipping… Divine!
Top Tricks
- To keep your pita soft after baking, cover it with a clean towel. It helps a ton!
Frequently Asked Questions
How do I know when the pita bread is done cooking?
It’s done when it puffs up nicely and you see a bit of golden color on the outside. It’s like a little cloud of perfection.
Can I use whole wheat flour instead of all-purpose flour?
You sure can! Just remember, it might be a tad denser, so maybe tweak the water a bit…
Why is my pita bread not puffing up?
Ah, we’ve all been there! If it’s too thin or your oven isn’t hot enough, it might not puff up like you want. Try to keep that heat cranked!
Can I make pita bread ahead of time?
Absolutely! After the first rise, that dough can chill in the fridge for a couple days or even go straight into the freezer.
What can I fill my pita bread with?
Oh my gosh, the options are endless! Falafel, grilled veggies, chicken, or even just cheese and a sprinkle of herbs—whatever makes your taste buds tingle!
Conclusion
Pita bread is just one of those things that can transform any meal into something special. It’s… light, fluffy, and has a pocket that’s just begging for a delicious filling. Honestly, once you start making it at home, you’ll wonder why you ever bought it pre-made. Enjoy the process, the aroma, and oh, so many tasty fillings!
More Recipes Suggestions and Combination
Stuffed Pita with Falafel
Fill it with crispy falafel, fresh greens, tomatoes, and drizzle a little tahini sauce on top—trust me, you’ll love it!
Chicken Shawarma Pita
Mix marinated grilled chicken, garlic sauce, cucumbers, and a hint of pickles for a unique experience.
Vegetable Hummus Pita
Spread your favorite hummus in the pita and toss in some roasted veggies—it’s a simple but lovely snack!
Breakfast Pita with Eggs
Scramble eggs, add some cheese, spinach, and maybe a bit of salsa for a killer breakfast option.
Meatball Pita Sandwich
Stuff it with juicy meatballs and marinara, sprinkle some mozzarella on top—so comforting…
Greek Salad Pita
Just chop cucumbers, tomatoes, throw in some feta and olives, then drizzle olive oil for a fresh, zesty meal!