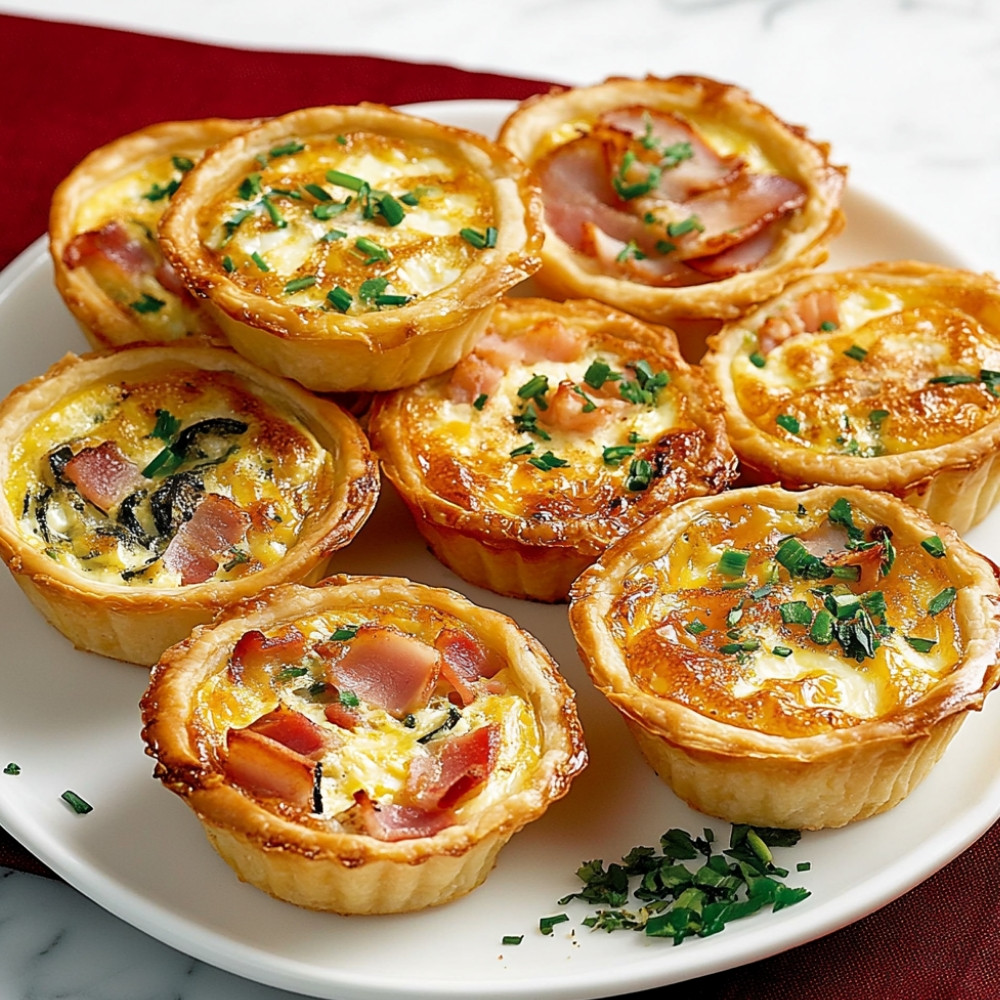
Mini Quiches with Three Flavors
so… these mini quiches. I still remember the first time they sort of happened – wasn’t a plan, just leftover bits in the fridge and a quiet weekend morning. I didn’t think much of them, but as they baked, the kitchen filled up with that buttery, eggy warmth, and suddenly everyone was asking what smelled so good. Think crisp edges, custardy centers, little surprises tucked into every bite. Since then, they’ve become a kind of ritual, especially when I can’t decide what to make or need a little bit of everything – veggie, cheesy, savory. A very comforting kind of chaos.
Why You’ll Crave It
- Three flavors in one tray – perfect for indecisive minds (like mine… most days)
- Tuck in almost anything – great for leftovers, even better for showing off fresh produce
- Warm, cheesy, golden – you already know how good that is
- They freeze beautifully, if you manage not to eat them all first
- Just the right size for snacks… or accidental second breakfasts
The first time I made these, my mom was visiting – she swore she’d only eat one but ended up wrapping a few “for the train ride home.”
What You’ll Need
- 4 large eggs: fresh as you can find – it’ll make a difference
- 100 ml milk: whole milk or something richer like half and half works really well
- Salt: to taste – I usually start with a fat pinch, then adjust
- Freshly ground black pepper: a couple turns of the mill, enough to feel present without taking over
- 100 g cheese: grated – try cheddar, gruyère, or a sharp mix if you’re feeling bold
- 200 g vegetables: whatever’s seasonal or about to go soft – peppers, chopped spinach, mushrooms, even thin asparagus
- 100 g cooked meat (optional): diced bacon, ham, or leftover roast chicken all have their charm
- Ready-made pastry or phyllo dough: just enough to line the muffin tin – you can cut rounds or rustic squares, no need for perfection
Easy How-To
Preheat that oven
180°C – 350°F – standard affair, but do it early so it’s ready when you are. Everything cooks better with good timing.
Line your muffin tin
Grab some ready-made pastry and press it lightly into the cups. Doesn’t need to be perfect at all – actually, the craggy corners get beautifully crisp. Butter or oil the tin, just in case.
Whisk your eggs
In a big enough bowl, beat the eggs with milk, salt, and pepper. Whisk until it’s a little frothy, pale yellow, no big streaks. I like using a fork for this – less fuss.
Choose your flavours
This part’s the fun one. Spoon your fillings into each pastry-lined cup. Maybe one’s just cheese and onion, another with mushroom, spinach, a bit of feta… don’t overfill, they need space to puff a bit.
Fill with egg mix
Carefully pour your egg mixture into each cup – about ¾ full is good. I use a small jug or measuring cup, makes it less splashy.
Bake
Pop them into the oven – middle rack and let them do their thing for around 15 minutes. They’ll puff up, get golden, smell incredible. Peek through the oven light, but try not to open the door too soon.
Cool and coax
Let them rest for a few minutes – you’ll want to eat them steaming hot (I always burn my tongue), but the custard finishes settling as they cool. They pop out easier with a gentle twist or a butter knife along the edge.
Serve (or sneak one early)
Serve warm, at room temp, even cold from the fridge when you’re in a rush – I won’t judge. They’re strangely satisfying at all the wrong hours.
Good to Know
- You can totally make these crustless if you’re avoiding carbs or just feeling lazy. Just grease the tin really well and watch them closely.
- If the egg mix overflows a little, it might stick – that’s okay, just carve around it. Still tasty.
- The smell is likely to pull in curious humans from elsewhere in the house – be prepared to share.
Serving Ideas
- With a simple green salad and a mustardy vinaigrette for lunch or dinner
- Stacked next to fruit and a cup of black tea for a weekend breakfast board
- A basketful for brunch gatherings – people always ask for the recipe
Top Tricks
- Let the fillings cool a little before adding the egg mix – hot ingredients might scramble it
- Use a paper towel to dab moisture off sautéed veggies – keeps the custard from turning watery
- If reheating, use the oven (not microwave) so the crust crisps back up instead of going soft
Frequently Asked Questions
Can I freeze these mini quiches?
Yes – wrap them snug in cling film, then tuck into a freezer bag or container. Reheat from frozen straight in the oven at 160°C (320°F) until warmed through and crisp again.
What kind of cheese works best for mini quiches?
Something meltable and flavorful. Cheddar, gruyère, even blue cheese if you’re feeling dramatic. Or blend a couple to balance richness and saltiness.
Do I have to use pastry?
Not at all. You can make them crustless for a lighter version – just grease the pan super well or use parchment muffin liners to help them release.
How far ahead can I prep them?
You can mix everything the night before (keep in the fridge) and bake in the morning. Or even bake ahead and reheat gently when guests arrive.
How do I know when they’re done?
They’ll look puffed, not jiggly, and lightly golden on top. You can check with a toothpick – it should come out clean or just barely wet.
