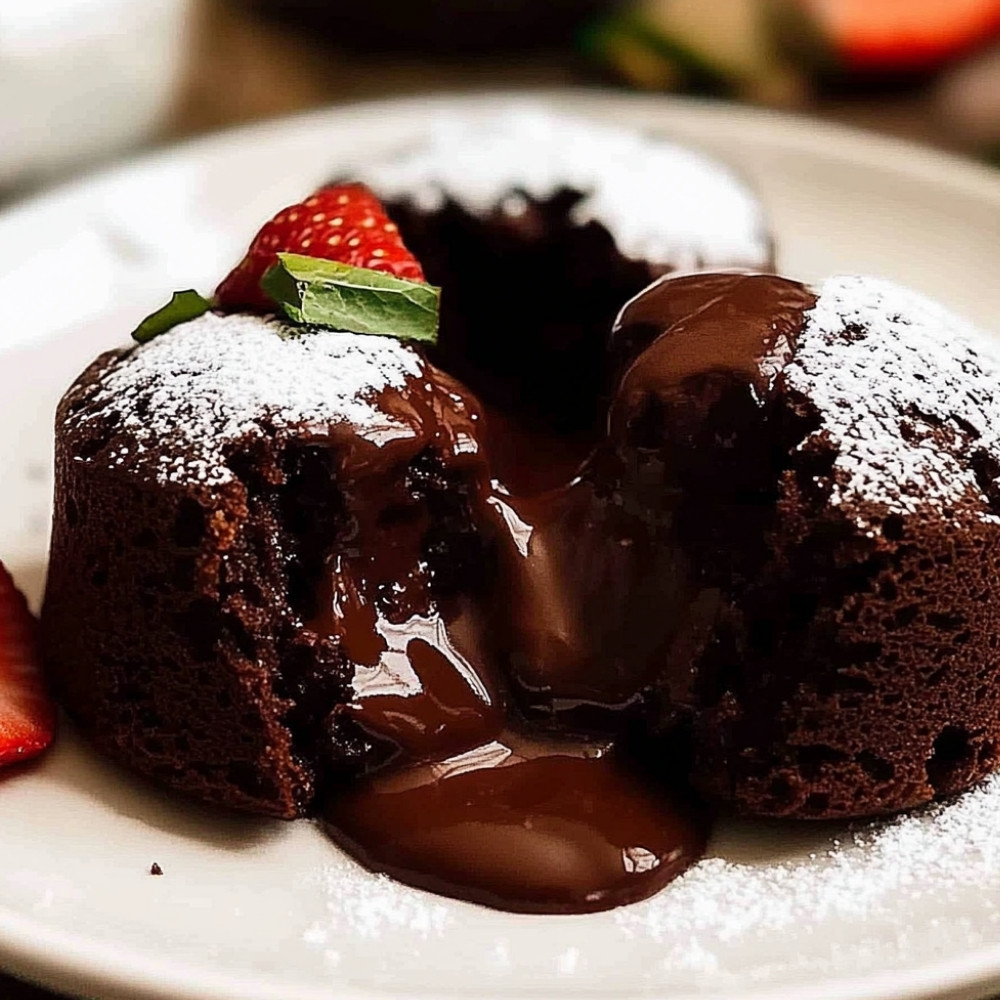
Molten Chocolate Lava Cakes
Alright, let me tell you about this molten chocolate lava cake recipe that, honestly, has a special place in my heart. There’s something magical about cracking into that soft, warm cake and watching the rich, gooey chocolate flow out like a little river. It’s, you know, the kind of dessert that makes you feel all warm and cozy inside—perfect for special occasions or just, you know, a Thursday night when you want to treat yourself. Plus, the whole process isn’t too complicated, so you don’t have to be a pastry chef to nail this one!
Why You’ll Crave It
- That ooey-gooey center is like a warm hug—you just need to try it!
- It’s a relatively quick dessert that feels fancy; perfect for impressing friends or that special someone.
- The rich chocolate flavor? It’s like a little piece of heaven in every single bite!
- You can dress it up however you like: ice cream, berries, a dusting of powdered sugar… yum!
- And it’s totally customizable—add nuts, coffee, or even a swirl of peanut butter if you feel adventurous!
The first time I made these for my family, everyone just… well, let’s say it ended with a bit of friendly competition over who got the last one!
What You’ll Need
- Dark chocolate: 200g of high-quality dark chocolate—70% or more is best, trust me.
- Unsalted butter: 100g, to keep everything nice and smooth
- Granulated sugar: 150g for that perfect sweetness
- Eggs: 2 large, plus 2 egg yolks—gotta get that richness!
- All-purpose flour: 50g, just enough to hold it all together
- Salt: a pinch to balance everything out—it really makes a difference!
Easy How-To
Get ready for molten magic
First things first, let’s get that oven preheating to 200°C (400°F)—you want it nice and hot. While that’s happening, grease up four ramekins with a bit of butter and dust them with cocoa powder. This is super important, trust me, or your cakes might stick and you don’t want that! Next up, in a medium heatproof bowl, toss in your chopped dark chocolate and the butter, and melt them together until it’s all smooth and dreamy—microwave works, or you can use a double boiler if you’re feeling fancy. Then, in another bowl, whisk together the two large eggs, the egg yolks, and sugar until it’s thick and slightly pale—it’ll take just a minute… keep whisking. Once that’s ready, add the melted chocolate mix into the eggs, stirring gently until everything’s combined. Now, sift in the flour and fold it in just until you can’t see any flour anymore. Don’t overmix, or the cakes might turn out a bit rubbery! Now, evenly divide that luscious batter into your ramekins, filling them about three-quarters full. Pop those babies into the oven and bake for about 12-14 minutes… you want the edges set and the center still soft—this is key! Once done, let them cool for a minute or two, then run a knife around the edges for easy release. Invert onto a plate and voilà—gorgeous molten chocolate cakes!
Good to Know
- Use good-quality chocolate. Seriously, it makes all the difference in flavor.
- Every oven is different, so check your cakes a minute or two early—better to be safe than sorry!
- You can totally make the batter ahead of time and stash it in the fridge until you’re ready to bake! Just let it warm up a bit before baking.
Serving Ideas
- Serve warm with a scoop of vanilla ice cream—like the best combination of hot and cold!
Top Tricks
- If you’re feeling fancy, add a sprinkle of flaky sea salt on top of the molten cakes before serving. It really enhances the chocolate flavor.
Frequently Asked Questions
What can I use if I don’t have ramekins?
You can use any small, oven-safe dishes! Just watch the baking time, because you might need to adjust it depending on the size—or you can risk things a bit and go for muffin tins!
Can I use milk chocolate instead of dark?
Sure, you can! Just keep in mind that it’ll be sweeter and might change the overall vibe a bit. But hey, if you love milk chocolate, go for it!
How can I tell when they’re done?
The edges will be firm, but the middle will still look a little jiggly—that means you’ve hit the sweet spot for that molten center!
Can I make these gluten-free?
Yes! Just swap the all-purpose flour with a gluten-free flour blend. It should work pretty well, just check the package for measurements!
How do I stop the cakes from sticking?
Greasing and dusting with cocoa powder really helps! If you feel a bit nervous, you could also place baking parchment at the bottom of the ramekins.
Conclusion
So there you have it—molten chocolate lava cakes that’ll knock your socks off! They’re simple, yet totally impressive, perfect for when you want to treat yourself or wow your guests. With just a bit of effort, you can create a dessert that’s really unforgettable and, seriously, so worth it. Make sure you give these a try—they’re a warm hug for the soul, and I promise you won’t regret it!
More Recipe Suggestions and Combinations
Vanilla Ice Cream Pairing
Serve it warm alongside a scoop of creamy vanilla ice cream for that perfect contrast—you just can’t go wrong here!
Fresh Berries Topping
Top with raspberries or strawberries for a fresh pop that cuts through the richness. It’s that perfect balance!
Peanut Butter Swirl
For the peanut butter lovers, a swirl of creamy peanut butter before baking is just divine… trust me on this one!
Mint Chocolate Variation
If you love mint, add a little extract or serve with mint chocolate chip ice cream for a refreshing twist to the classic combination.
Salted Caramel Drizzle
Drizzle some salted caramel on top for an extra indulgent touch—it’s like a hug for your taste buds!