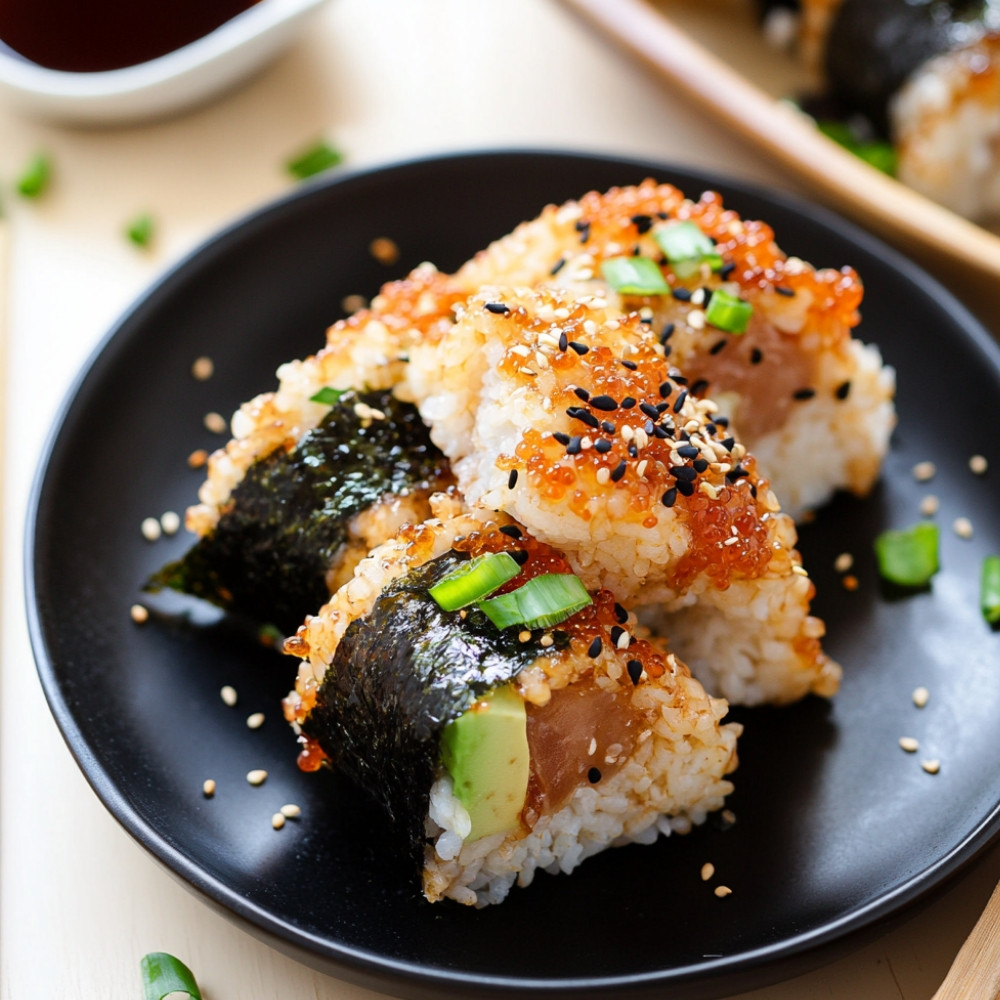
Spicy Tuna Onigiri: A Delicious Japanese Rice Treat
Oh my goodness, let me tell you… there’s something just so cozy about making onigiri, especially when you’re filling them with spicy tuna. It’s like a hug in food form, right? You get that lovely, sticky sushi rice, and then the kick from the sriracha-infused tuna… it’s a flavor explosion! I mean, you can really customize these rice balls to your heart’s content. They’re fun for parties, lunchboxes, or just because you feel like making something special—but honestly, who doesn’t love a good onigiri? Let’s dive into this delicious recipe together!
Why You’ll Crave It
- That perfect balance of creamy mayonnaise and spicy sriracha—it’s just… amazing.
- So easy to make, like, once you get the hang of it, you can mix and match fillings!
- They’re super portable, making them great for picnics or snackin’ on the go.
- Customizable! Trust me, you can get creative with whatever you have on hand.
- And, um, they just look pretty when you plate them up—they’ll impress your friends for sure!
The first time I made these for my family, they practically gobbled them up in seconds… I knew I was onto something special!
What You’ll Need
- Cooked sushi rice: 2 cups, perfectly sticky and fluffy, that’s what you want.
- Nori (seaweed sheets): 2 sheets, cut into strips when we get to assembly.
- Canned tuna: 1 can (about 5 ounces), use whatever brand you like best.
- Mayonnaise: 2 tablespoons, creamy goodness, that ties it all together.
- Sriracha: 1 tablespoon, or more if you’re feeling brave!
- Salt: to taste, you’ll want just enough to enhance the flavors.
- Sesame seeds: for garnish, optional but adds that nice touch.
- Green onions, chopped: for garnish, totally enhances the look!
Easy How-To
Step 1: Prepare Sushi Rice
Okay, first—let’s rinse that sushi rice… give it a good wash under cold water until the water runs clear. We want to wash away that excess starch. It’s a bit of a process, but it’s important! Then, just cook it according to package instructions, whether you’re using a rice cooker or the stove. After it’s cooked, let it sit, covered, for about 10-15 minutes—you want it nice and fluffy!
Step 2: Season the Rice
In a separate bowl, mix together some rice vinegar, sugar, and salt until it’s all dissolved. Then, gently—very gently—fold that mixture into your warm rice. Use a wooden spatula so you don’t squish all the grains. Let it cool down to room temp on a flat surface; you don’t want it steaming when you make the onigiri!
Step 3: Prepare Spicy Tuna Filling
Now, grab a bowl and combine that diced tuna with mayonnaise, sriracha, sesame oil, and a little pinch of salt. Mix it until everything is all, well, mixed! You can adjust the spiciness by adding more sriracha based on your taste. Trust me, you might want to sample it—you know, quality control!
Step 4: Form Onigiri
So, wet your hands with a bit of water to keep the rice from sticking too much—this is key! Take a handful of the sushi rice and flatten it a bit in your palm. Then, place some of that spicy tuna filling right in the center. Now mold the rice around it into a triangular shape. Press gently but firmly; you want it to hold together, ya know?
Step 5: Add Seaweed
Cut your nori into strips or squares, whatever looks good to you. Wrap a piece around your onigiri, leaving a bit of the rice exposed. It’s all about that beautiful presentation!
Step 6: Serve
Alright, now arrange those stunning onigiri on a plate… they can be served right away, or if you’re saving them for later, pop them in an airtight container in the fridge for a few hours. Serve with soy sauce or maybe some pickled ginger—you know, to elevate the whole experience.
Good to Know
- These are best eaten fresh, but they can hang in the fridge for about a day. Just keep them airtight to avoid that rice drying out.
- You can totally customize your fillings; cook some salmon, throw in some chopped veggies, or even sweet pickles!
- Make sure your rice is sticky enough; it’s crucial for holding everything together. Dry rice just won’t cut it.
Serving Ideas
- For a lovely light lunch, pair these onigiri with some chilled edamame or a crisp salad.
Top Tricks
- When shaping your onigiri, a little garlic powder in the rice can add a nice twist—just a thought!
Frequently Asked Questions
Can I use any type of rice for onigiri?
Honestly, it’s best to stick with Japanese short-grain rice since it’s got that perfect starchy quality to help them stay together. Just trust me on this one!
How can I add flavor to my onigiri rice?
You can definitely mix in salt or even some furikake or sesame seeds into the rice before shaping—it adds a nice little flavor boost!
Can I make onigiri ahead of time?
Absolutely! Just be sure to store them properly; wrap them up to keep that delicious rice fresh!
What are some popular fillings for onigiri?
Common fillings? Think tuna, salmon, or even pickled plum. But don’t be shy; you can get creative!
Is it necessary to use nori?
Nori adds a lovely flavor, but hey, it’s not essential! You can totally enjoy onigiri without it if seaweed isn’t your thing.
Conclusion
Creating onigiri with spicy tuna is just one of those delightful things that, once you try it, you’ll want to make again and again. The tender rice with that kicky filling wrapped in nori… it’s such a comforting experience! Making these little treats is not just about food; it’s a wonderful way to connect with flavors and memories, no matter how you personalize them.
More recipe suggestions and combinations
Spicy Salmon Onigiri
Combine cooked salmon with sriracha and mayonnaise for a delicious twist on the classic spicy tuna.
Vegetable Onigiri
Fill your onigiri with a mixture of pickled veggies, creamy avocado, and sesame seeds for a refreshing vegetarian option.
Teriyaki Chicken Onigiri
Use shredded teriyaki chicken as the filling for a savory and sweet flavor combo that pairs beautifully with rice.
Kimchi Onigiri
Incorporate kimchi into your onigiri for a spicy and tangy kick that adds a Korean flare.
Cheese Onigiri
Add a slice of cheese, like cheddar or mozzarella, to your onigiri for a melty, comforting combo you won’t forget!