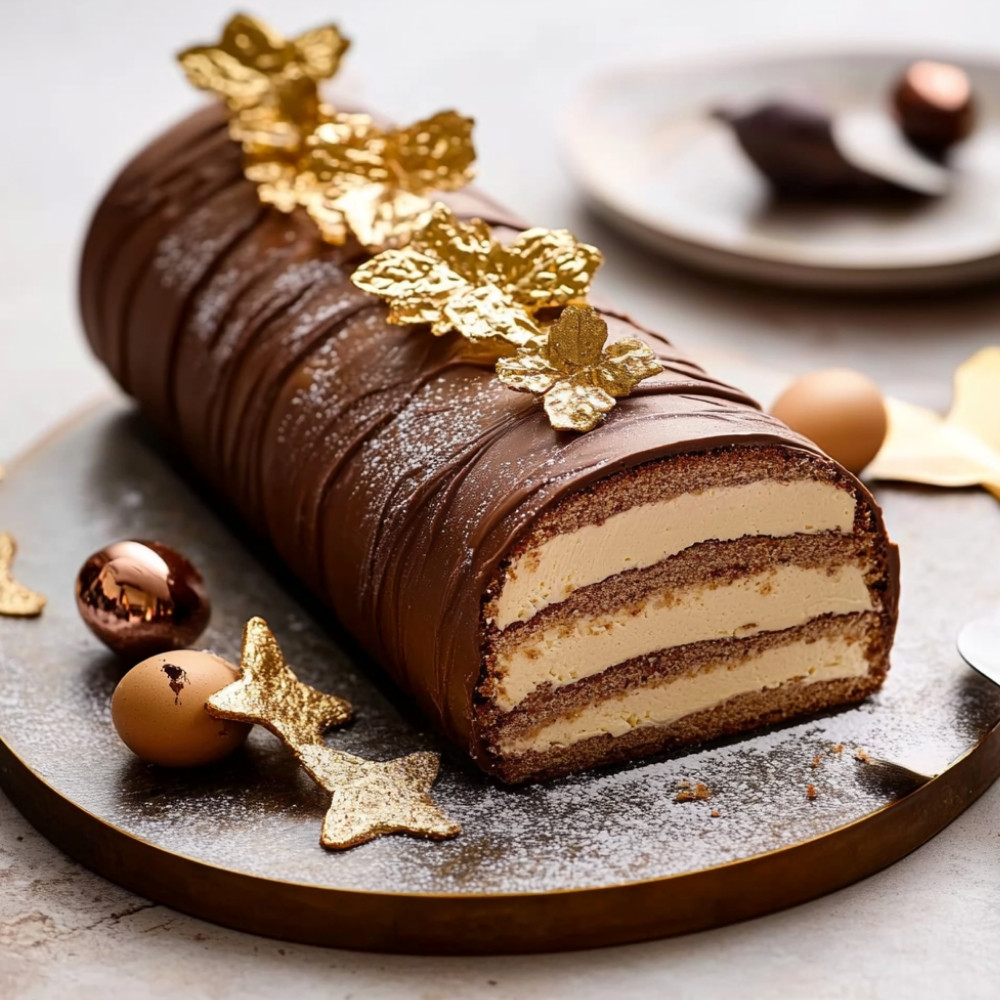
Three Creams Log
There’s something almost secretive about slicing into a bûche aux trois crèmes – the outside looks humble (a bit snowy, sometimes dusted with cocoa or curled-up shavings), but once you cut through, this whole inner world of soft creams and cocoa sponge peeks out. I remember the first time I made it, how the chocolate scent wrapped around the kitchen even before the log was rolled… and the first slice tipped slightly on the plate, all three layers swirled like a ribbon inside. Not perfect – but honestly, that’s what made it feel homey and real.
Why You’ll Crave It
- Three distinct cream flavors – vanilla, chocolate, coffee – that somehow feel both indulgent and light
- The sponge is airy and soft but strong enough to cradle the fillings without collapsing
- It chills beautifully, meaning you can make it ahead (a lifesaver before big dinners)
- The slice is just show-stopping enough for a celebration, but the flavors feel familiar and comforting
- No fancy molds or gadgets needed – just a good spatula and a bit of patience
The first time I made this, I stayed up until after midnight watching it set – I just couldn’t sleep until I knew the roll hadn’t collapsed.
What You’ll Need
- 4 large eggs: room temperature, for better volume when whisked
- 125g granulated sugar: not too much, just enough to sweeten the sponge delicately
- 100g all-purpose flour: sifted if you can, helps keep the cake tender
- 30g unsweetened cocoa powder: deepens the flavor of the sponge without making it heavy
- 1 pinch of salt: never forget this, even in sweets – it balances everything
- 200ml heavy cream (for each cream layer): chilled, so it whips properly
- 50g powdered sugar per cream: mixes in easily without graininess
- 1 vanilla bean or 1 tsp vanilla extract: split and scraped, the little black dots are pure joy
- 2 tbsp strong brewed coffee: cooled completely, for the coffee cream
- 100g dark chocolate: roughly chopped or buttons, around 70% cocoa is lovely
- Cocoa powder or dark chocolate shavings: to finish – use what makes you smile
Easy How-To
Make the sponge base
Start with the eggs – separate them carefully. Beat the yolks with the sugar until thickened, pale and ribbon-y. Stir in the sifted flour, cocoa, and salt gently. Beat the whites just until they form peaks that hold – not too dry – then fold them into the yolk mix with a light touch. Pour into a lined baking tray, spread evenly, and bake at 180°C for around 12 minutes. The edges will slightly pull away, and it’ll spring back when touched. Let it cool under a damp cloth so it stays flexible… you’ll thank yourself later.
Time for vanilla cream
Warm the cream with your halved vanilla bean until fragrant, then let it cool a bit. Meanwhile, whip more heavy cream until soft but sturdy peaks form and gently fold in the powdered sugar and cooled vanilla cream. This one is the mellowest of the three – simple, but so necessary.
Get into the chocolate cream
Melt that dark chocolate over a gentle bain-marie until smooth. While it cools, whip the cream with powdered sugar. Fold the chocolate into the whipped cream slowly – it might firm up a touch as it hits the cool ingredients, so work swiftly but gently. It feels like spreading ganache, but silkier.
Build the coffee cream
Brew your coffee strong – I like a French press here. Let it cool completely so it doesn’t mess with the whipped cream texture. Add it to your sugared cream and whisk until soft, pillowy peaks form. The coffee flavor intensifies after chilling, a quiet surprise in every bite.
Assemble the log
Lay your sponge on parchment, and spread each cream in thirds: vanilla first, then chocolate, then coffee. Start from the short edge and slowly roll, using the parchment to help it along like a sushi roll. Don’t worry if some filling sneaks out – just tuck it back in, or eat it (I always do). Wrap tightly in plastic wrap and let it chill for at least 4 hours – overnight if you can wait.
Decorate with heart
Unwrap gently. Smooth the outside with whipped cream, or leave naked if you like a more rustic look. Dust with cocoa, or scatter dark chocolate curls on top. Every year, I do something slightly different. Sometimes I lean on simplicity, sometimes I go all in with gold leaf and sugared rosemary. It depends on the mood, and who’s coming to dinner.
Slice and serve
A thin, sharp knife works best. Clean between slices if you want neat layers, or embrace the messiness and natural swirl. Serve chilled, but let it warm just slightly before biting in – those flavors bloom better that way.
Good to Know
- Place the sponge on a damp tea towel while it’s warm – it softens the crust just enough for rolling later
- If your whipped cream looks curdled, you probably over-whipped it just a bit – add a spoonful of un-whipped cream and gently fold it in to bring it back
- Layering the creams works best when they’re all the same texture – don’t be tempted to overchill between steps or they’ll be hard to spread
Serving Ideas
- Serve with small cups of espresso, or delicate black tea – nothing too floral
- A generous spoon of cherry compote on the side adds just enough brightness
Top Tricks
- Wrap your finished log in parchment before the plastic wrap – it helps keep the shape stable and avoids condensation issues
- You can freeze the rolled sponge (without creams) ahead of time, which saves a huge step on the day you assemble
Frequently Asked Questions
Can I make this without coffee?
Yes, you can leave out the coffee entirely, or substitute it with a flavored extract like hazelnut or almond – just use a very small amount to avoid overpowering the cream.
Is this very sweet?
Surprisingly not. Each cream is gently sweetened, and the cocoa sponge adds a touch of bitterness that keeps everything in balance. It feels rich, not cloying.
Can I make the creams in advance?
You can prepare the components a few hours ahead, but don’t whip the cream too far in advance – it can deflate or start to weep. I usually make the creams right before layering.
Do I need gelatin to stabilize the creams?
Not at all, as long as you chill it long enough. The whipped cream holds up beautifully once the log is wrapped and set.
How long does it last?
It’s best within the first two days – the texture is creamiest then. But I’ve enjoyed slices that were three days old, and they were still absolutely lovely.