Walking Taco Casserole
Okay, so picture this. It’s a cool Sunday evening, windows cracked just slightly, the smell of something warm and boldly spiced drifting down the hallway. That kind of smell that makes whoever’s nearby peek into the kitchen and ask, “What is that?” That’s the Walking Taco Casserole. It’s familiar and messy in all the right ways – layers of melty cheddar and crisp corn chips crumbling into juicy beef, the refried beans almost melting into the edges… and it’s just, well, unapologetically cozy. I never really thought of casseroles as exciting until this one stormed into my kitchen. And stuck around, honestly.
Why You’ll Crave It
- It grabs everything you love about tacos and piles it into one glorious, cheesy scoop.
- Excellent for feeding a group – casual potluck, game day, or random Tuesday dinner with leftovers.
- The top stays golden and crispy, but underneath? That oozy, savory comfort layer gets me every time.
- You can tweak it endlessly – spice it up, switch the meat, go vegetarian. It plays nice with your cravings.
- And yes, the kids (or let’s be honest, adults too) love the fun of scooping it straight from the dish like taco nachos.
The first time I made this, we ate nearly the whole pan standing up around the stove – none of us could stop “tasting.”
What You’ll Need
- Ground beef: 1 pound, lean works best but any will do – make sure it’s browned and not too greasy
- Taco seasoning: 1 packet (about 1 ounce) – the smoky stuff, full of cumin and paprika
- Refried beans: 1 can (15 ounces), smooth and salty and just the right amount of mushy
- Cream cheese: 8 ounces, softened – it adds a dreamy richness underneath everything
- Salsa: 1 cup, medium heat unless you want a kick (I like a chunky fire-roasted one)
- Corn: 1 can (15 ounces), drained – sweet and chewy, it balances the spice so well
- Cheddar cheese: 2 cups, shredded, sharp if you can – milder if you want more gooeyness
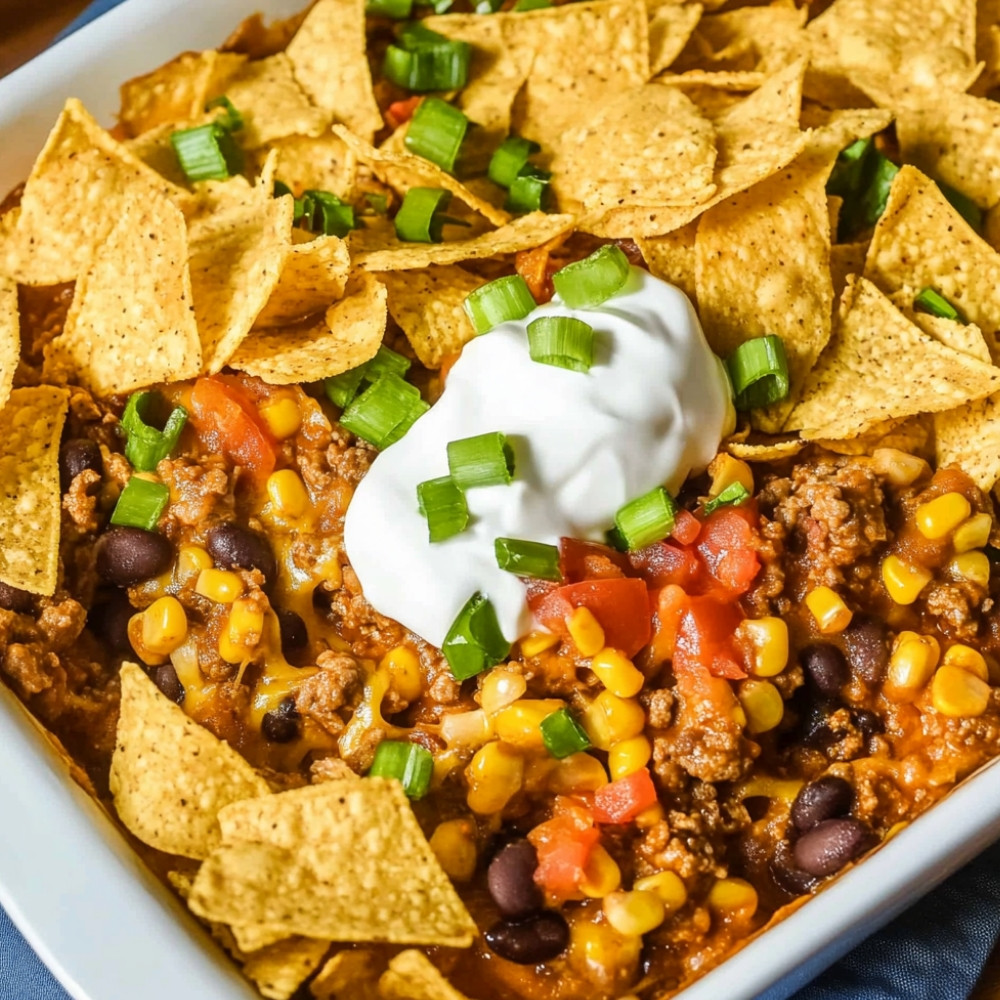
- Crushed tortilla chips: 2 cups, roughly crushed – not dust, but shards and crumbles
- Green onions: ¼ cup, sliced thin right before serving for freshness
- Sour cream: for dolloping – softens every bite just a little
Easy How-To
Heat up your oven
Preheat to 350°F (175°C). Nothing fancy yet. Just get that nice warm oven smell going through the kitchen.
Brown that beef
In a pan, over medium heat, toss in the ground beef. Cook it down till the pink’s gone, and the edges start browning just a little. Drain off the extra fat – you want flavor, not grease.
Spice things up
Stir in the taco seasoning mix. If you’re using one of those pre-made packets, just follow the water directions too (usually a bit under a cup). Let it simmer for 5 minutes-ish – you want all the seasoning to really soak in.
Make the creamy base
In a bowl, mash together the refried beans, softened cream cheese, salsa, and corn. It’s like the savory version of dessert batter. Don’t overthink it – lumpy is fine. Just stir until it’s mostly mixed and a little spoonable.
Build the layers
In a greased 9×13-inch baking dish, spread the bean mix first (bottom layer). Then scatter half of your seasoned beef on top. Sprinkle a generous layer of cheese, and then half of the crushed chips. Repeat it – layer again with the rest of the beef, more cheese, chips again.
Bake it till bubbly
Pop it into the oven – uncovered – for 25 minutes, give or take. Once the top looks golden and the edges are bubbling, you’ll know it’s done. If you’re like me and like things a little crunchier, give the broiler a blink – but don’t walk away.
Add the finishing touches
Let it rest a bit (5 minutes makes all the difference). Then sprinkle green onions across like confetti. Set out a bowl of sour cream for scooping. You could also add jalapeños or chopped tomatoes if you’re feeling extra.
Good to Know
- If your chips feel a little stale, fear not. In the oven, they unclench and crisp right up again.
- If you’re out of cream cheese (happens to me more than I like to admit), a dollop of plain Greek yogurt actually works in a pinch.
- Don’t skip the rest time after it bakes. Otherwise, the layers collapse and it just… slides.
Serving Ideas
- Scoop over shredded lettuce and sliced cherry tomatoes for a light, salad-ish dinner
- Wrap up scoops in warm flour tortillas like messy, joyful burritos
- Top with crushed flaming-hot chips (I know, but trust me), avocado, and hot sauce for a spicier spin
Top Tricks
- Use block cheese and shred it yourself – it melts better and tastes sharper
- If you’re doubling for a party crowd, bake it in two smaller pans for easier serving and better heat-through
- Once cooled, leftovers crisp up brilliantly in a hot skillet with a splash of oil – better than microwave, always
Frequently Asked Questions
Can I assemble this ahead of time?
Yes – just keep the chips aside until right before baking so they don’t get soggy. You can layer everything else a day in advance and pop it straight in the oven.
What if I want it spicier?
Use hot salsa, throw in some chopped chipotle peppers, or add jalapeños into the meat while it simmers. Lots of room to play here.
Can I use beans instead of meat?
Certainly – black beans or lentils work great. Just season everything well and keep that balance of creamy, savory, and bold so it doesn’t fall flat.
Will the chips stay crispy?
Some do, some don’t – that’s part of the magic. You get crunch and soft in every scoop. But baking uncovered helps that top stay nice and crisp.
How do I store leftovers?
Cover and chill it for up to 3 days. Reheat in the oven or skillet to bring back some of that golden crusty edge.